Tables Adding a Table to a Page
In this demonstration, I will show how to add a table of data to an existing webpage.
General Steps
In general, the steps for adding a table of data to an existing Rails-based web app are as follows.
-
Step 1 Add HTML to the View. This step adds the basic HTML for the table to the view template for the webpage.
-
Step 2 Add CSS Styles to the HTML. This step customizes the style of table using CSS, mainly from the Bootstrap webpage-styling library.
Adding a Table to the Billy Books Home Page
To demonstrate the steps for adding a table of data to a webpage, we will be adding a table to the Billy Books bookstore home page that lists the store hours. Figure 1 illustrates how the table will look on the home page.
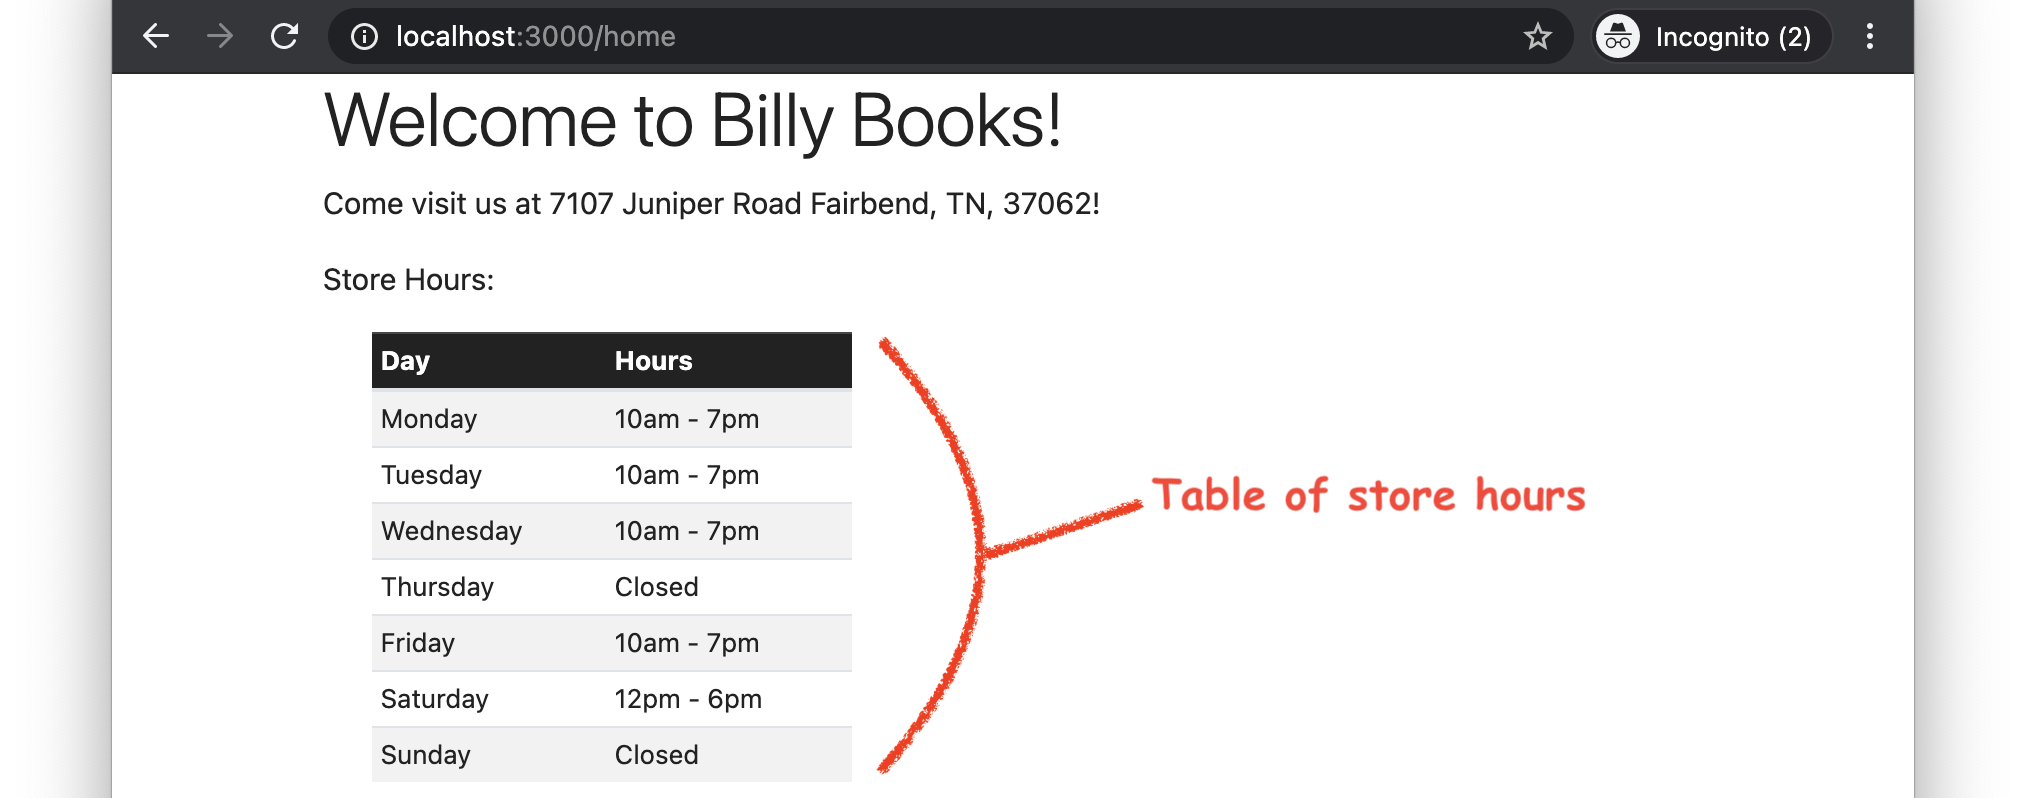
Figure 1. The Billy Books home page with a table listing the store hours.
We will start with the bookstore base app, which lists the store hours using a bullet list initially, and we will replace the bullet list with the above table.
Step 1 Add HTML to the View
In the base app, the store hours were presented as a bullet list of days/times, and they were coded using HTML <ul> (unordered list) and <li> (list item) elements. This code can be found at the bottom of the HTML.ERB view template, app/views/pages/home.html.erb, and looks like this:
<ul>
  <li>Monday: 10am - 7pm</li>
  <li>Tuesday: 10am - 7pm</li>
  <li>Wednesday: 10am - 7pm</li>
  <li>Thursday: closed</li>
  <li>Friday: 10am - 7pm</li>
  <li>Saturday: 12pm - 6pm</li>
  <li>Sunday: closed</li>
</ul>
To present the store hours in a table, we will replace this code with an HTML <table> element. It is recommended that you delay actually deleting the <ul>/<li> code until the table is complete, so you can copy/paste the days and times from it.
Substep
Add an empty <table> element. We begin our table by adding an empty <table> element, like this:
<table>

</table>
This <table> element will contain all the code for our table.
Substep
Add empty <thead> and <tbody> elements. We next add an empty <thead> element and an empty <tbody> element to our <table> element, like this:
<table>

  <thead>
  </thead>

  <tbody>
  </tbody>

</table>
HTML <table> elements generally contain these two sub-elements: the <thead> element holds the table’s header rows and the <tbody> element holds the rows that make up the body of the table.
Substep
Add the table-header row. To add the header row for the table, we insert into the <thead> element a <tr> (table row) element. Within the <tr> element, we insert two <th> (table header) elements, one for each column of the table. These two <th> elements contain the header text “Day” and “Hours”, respectively, like this:
<table>

  <thead>
    <tr>
      <th>Day</th>
      <th>Hours</th>
    </tr>
  </thead>

  <tbody>
  </tbody>

</table>
Substep
Add the table-body rows. To add the rows that make up the body of the table (i.e., that present each day of the week and the store hours for each day), we insert a <tr> element for each day of the week into the <tbody> element (seven <tr> elements in total). Within each <tr> element, we insert two <td> (table data) elements, one that contains the day and one that contains the store hours for that day, like this:
<table>

  <thead>
    <tr>
      <th>Day</th>
      <th>Hours</th>
    </tr>
  </thead>

  <tbody>
    <tr>
      <td>Monday</td>
      <td>10am - 7pm</td>
    </tr>
    <tr>
      <td>Tuesday</td>
      <td>10am - 7pm</td>
    </tr>
    <tr>
      <td>Wednesday</td>
      <td>10am - 7pm</td>
    </tr>
    <tr>
      <td>Thursday</td>
      <td>Closed</td>
    </tr>
    <tr>
      <td>Friday</td>
      <td>10am - 7pm</td>
    </tr>
    <tr>
      <td>Saturday</td>
      <td>12pm - 6pm</td>
    </tr>
    <tr>
      <td>Sunday</td>
      <td>Closed</td>
    </tr>
  </tbody>

</table>
Test It!
To confirm that we made this change correctly, we run the web app (as per this TODO deets page), and we open the URL http://localhost:3000/home in our web browser. The webpage displayed should look exactly like Figure 2.
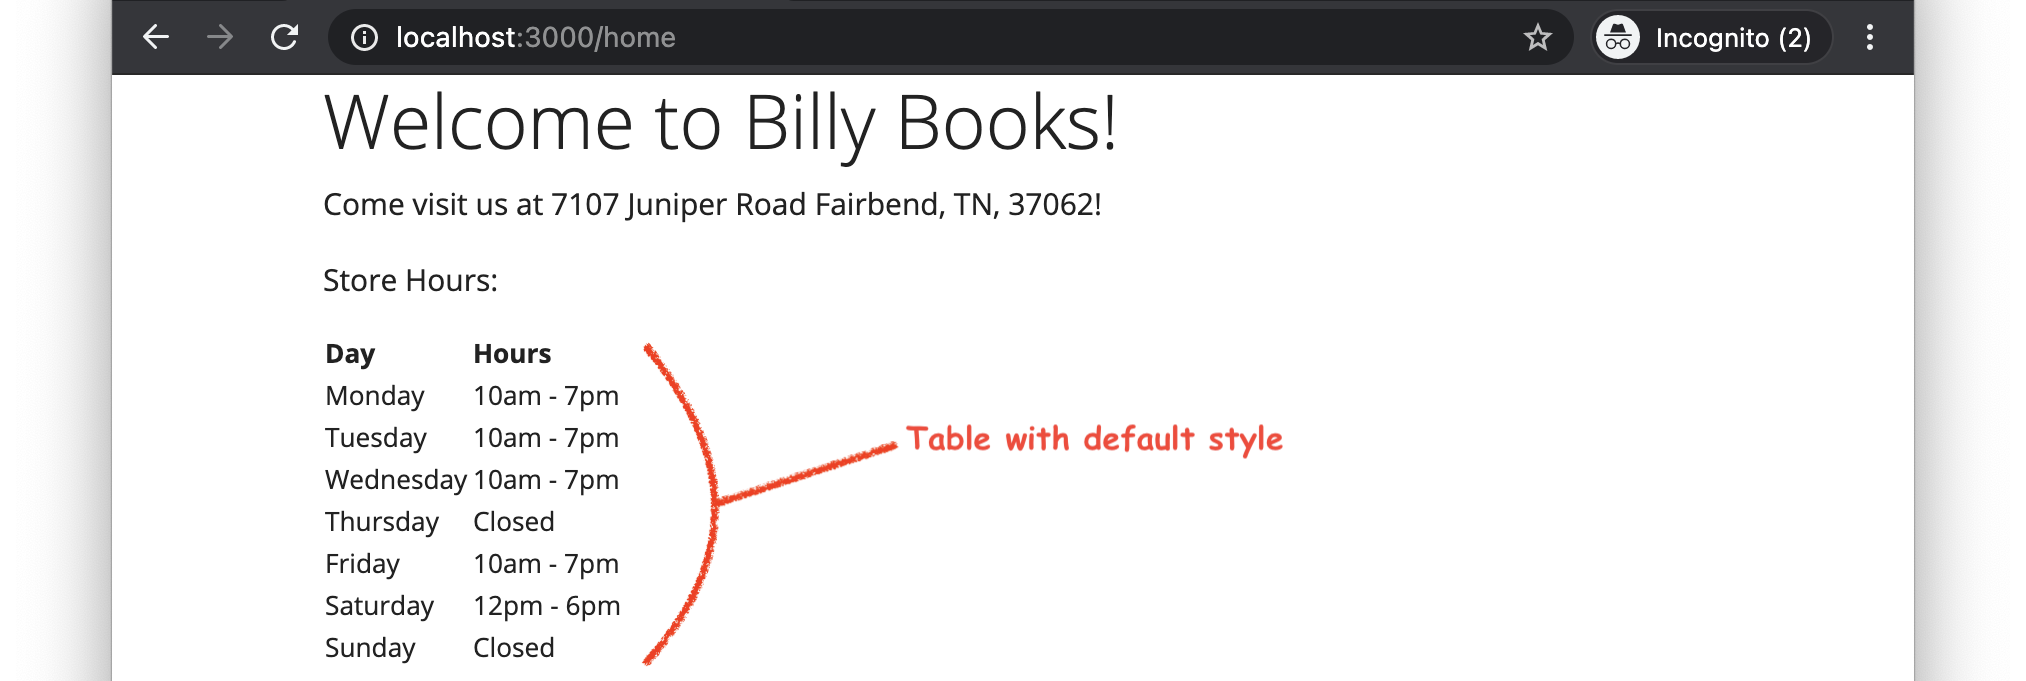
Figure 2. The Billy Books store hours presented as a table with the default styling applied.
Note that the table has only the default CSS styling applied to it. In the next step, we will customize the styling to make the table look more appealing.
Step 2 Add CSS Styles to the HTML
Substep
Apply the basic Bootstrap table styling. We will mainly rely on Bootstrap to style webpages in these demos, and to apply Bootstrap styling to a table, we first add the Bootstrap-provided CSS table class to our <table> element, like this:
<table class="table">

  …

</table>
When we run the app and open the URL http://localhost:3000/home, we see that applying the table CSS class changed the style of the table, as illustrated in Figure 3.
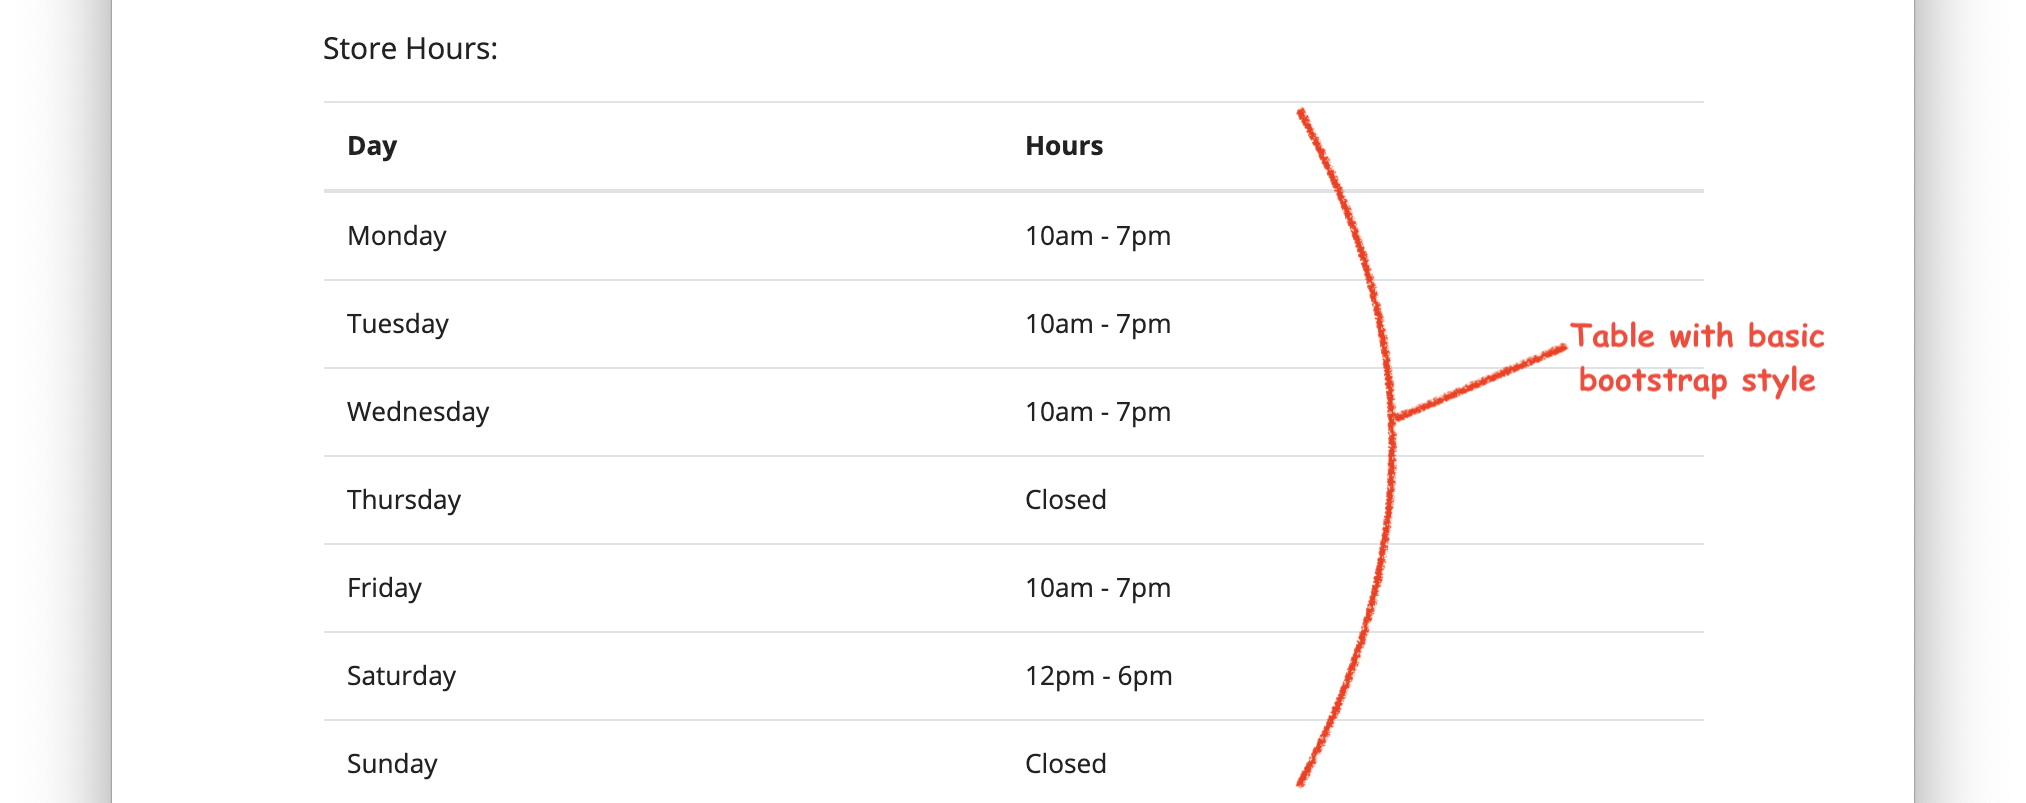
Figure 3. The store hours table with basic Bootstrap styling.
Although this styling is a start, we want to make further customizations to the style of the table, as shown in Figure 4.
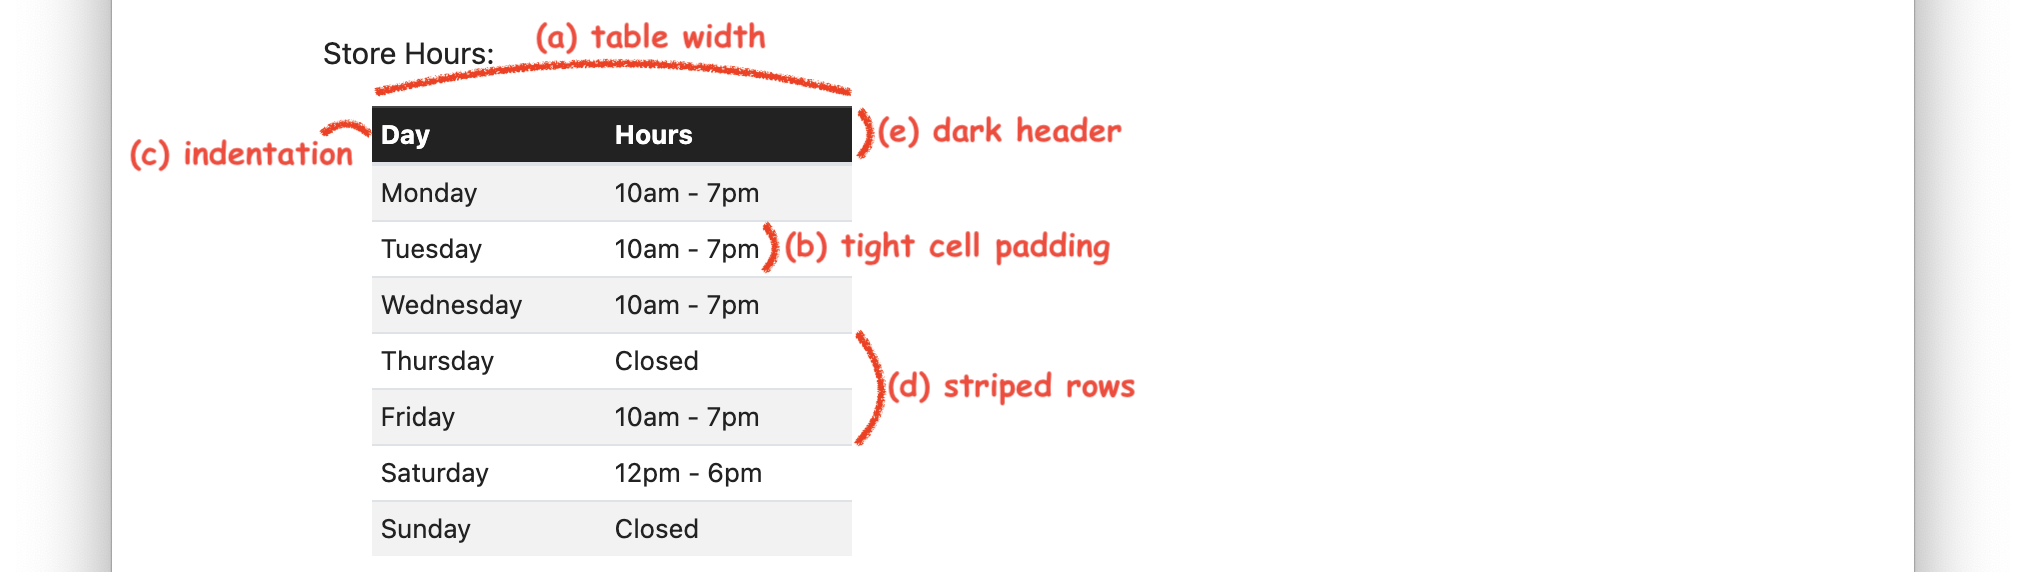
Figure 4. The store hours table annotated with all the style customizations to be made.
Substep
Adjust the table width. To make the table width narrower, as shown in Figure 4a, we restrict the width of the table to a maximum of 15 rem units by adding a CSS style attribute to the <table> element, like this:
<table class="table" style="max-width: 15rem;">

  …

</table>
Note that each rem unit is the size of the ‘m’ character relative to font-size of the root element (typically the <body> element). Thus, max-width: 15rem specifies that the table should never be wider that 15 ‘m’ characters in the font of the <body> element.
Substep
Tighten the cell padding. To tighten the padding around the text in each cell of the table, as shown in Figure 4b, we add the Bootstrap-provided CSS class table-sm to the <table> element, like this:
<table class="table table-sm" style="max-width: 15rem;">

  …

</table>
Substep
Indent the table. To indent the table slightly, as shown in Figure 4c, we add the Bootstrap-provided CSS class ml-4 to the <table> element, like this:
<table class="table table-sm ml-4" style="max-width: 15rem;">

  …

</table>
The ml in the Bootstrap class name ml-4 is short for the CSS style attribute margin-left. The 4 specifies the size of the margin in units defined by Bootstrap.
Substep
Make the table rows striped. To give the table rows alternating white and gray background colors, as shown in Figure 4d, we add the Bootstrap-provided CSS class table-striped to the <table> element, like this:
<table class="table table-sm table-striped ml-4" style="max-width: 15rem;">

  …

</table>
Substep
Darken the table header row. To give the header row a dark background and white font, as shown in Figure 4e, we add the Bootstrap-provided CSS class thead-dark to the <thead> element, like this:
<table class="table table-sm table-striped ml-4" style="max-width: 15rem;">

  <thead class="thead-dark">
    <tr>
      <th>Day</th>
      <th>Hours</th>
    </tr>
  </thead>

  <tbody>
    …
  </tbody>

</table>
Test It!
To confirm that we made this change correctly, we run the web app (as per this TODO deets page), and we open the URL http://localhost:3000/home in our web browser. The webpage displayed should look exactly like Figure 1.
Conclusion
Following the above steps, we have now formatted the store hours on the home page of the Billy Books bookstore app as a table of data.