Images Adding an Image to a Page
In this demonstration, I will show how to add an image to an existing webpage.
General Steps
In general, the steps for adding an image to an existing webpage are as follows.
-
Step 1 Import the Image File. This step adds the image file to the project, making it available for webpages to display.
-
Step 2 Display the Image. This step displays the image on a webpage using a view-helper method.
-
Step 3 Style the Image. This step customizes the appearance of image using CSS, mainly from the Bootstrap webpage-styling library.
Adding an Image to the Billy Books About Page
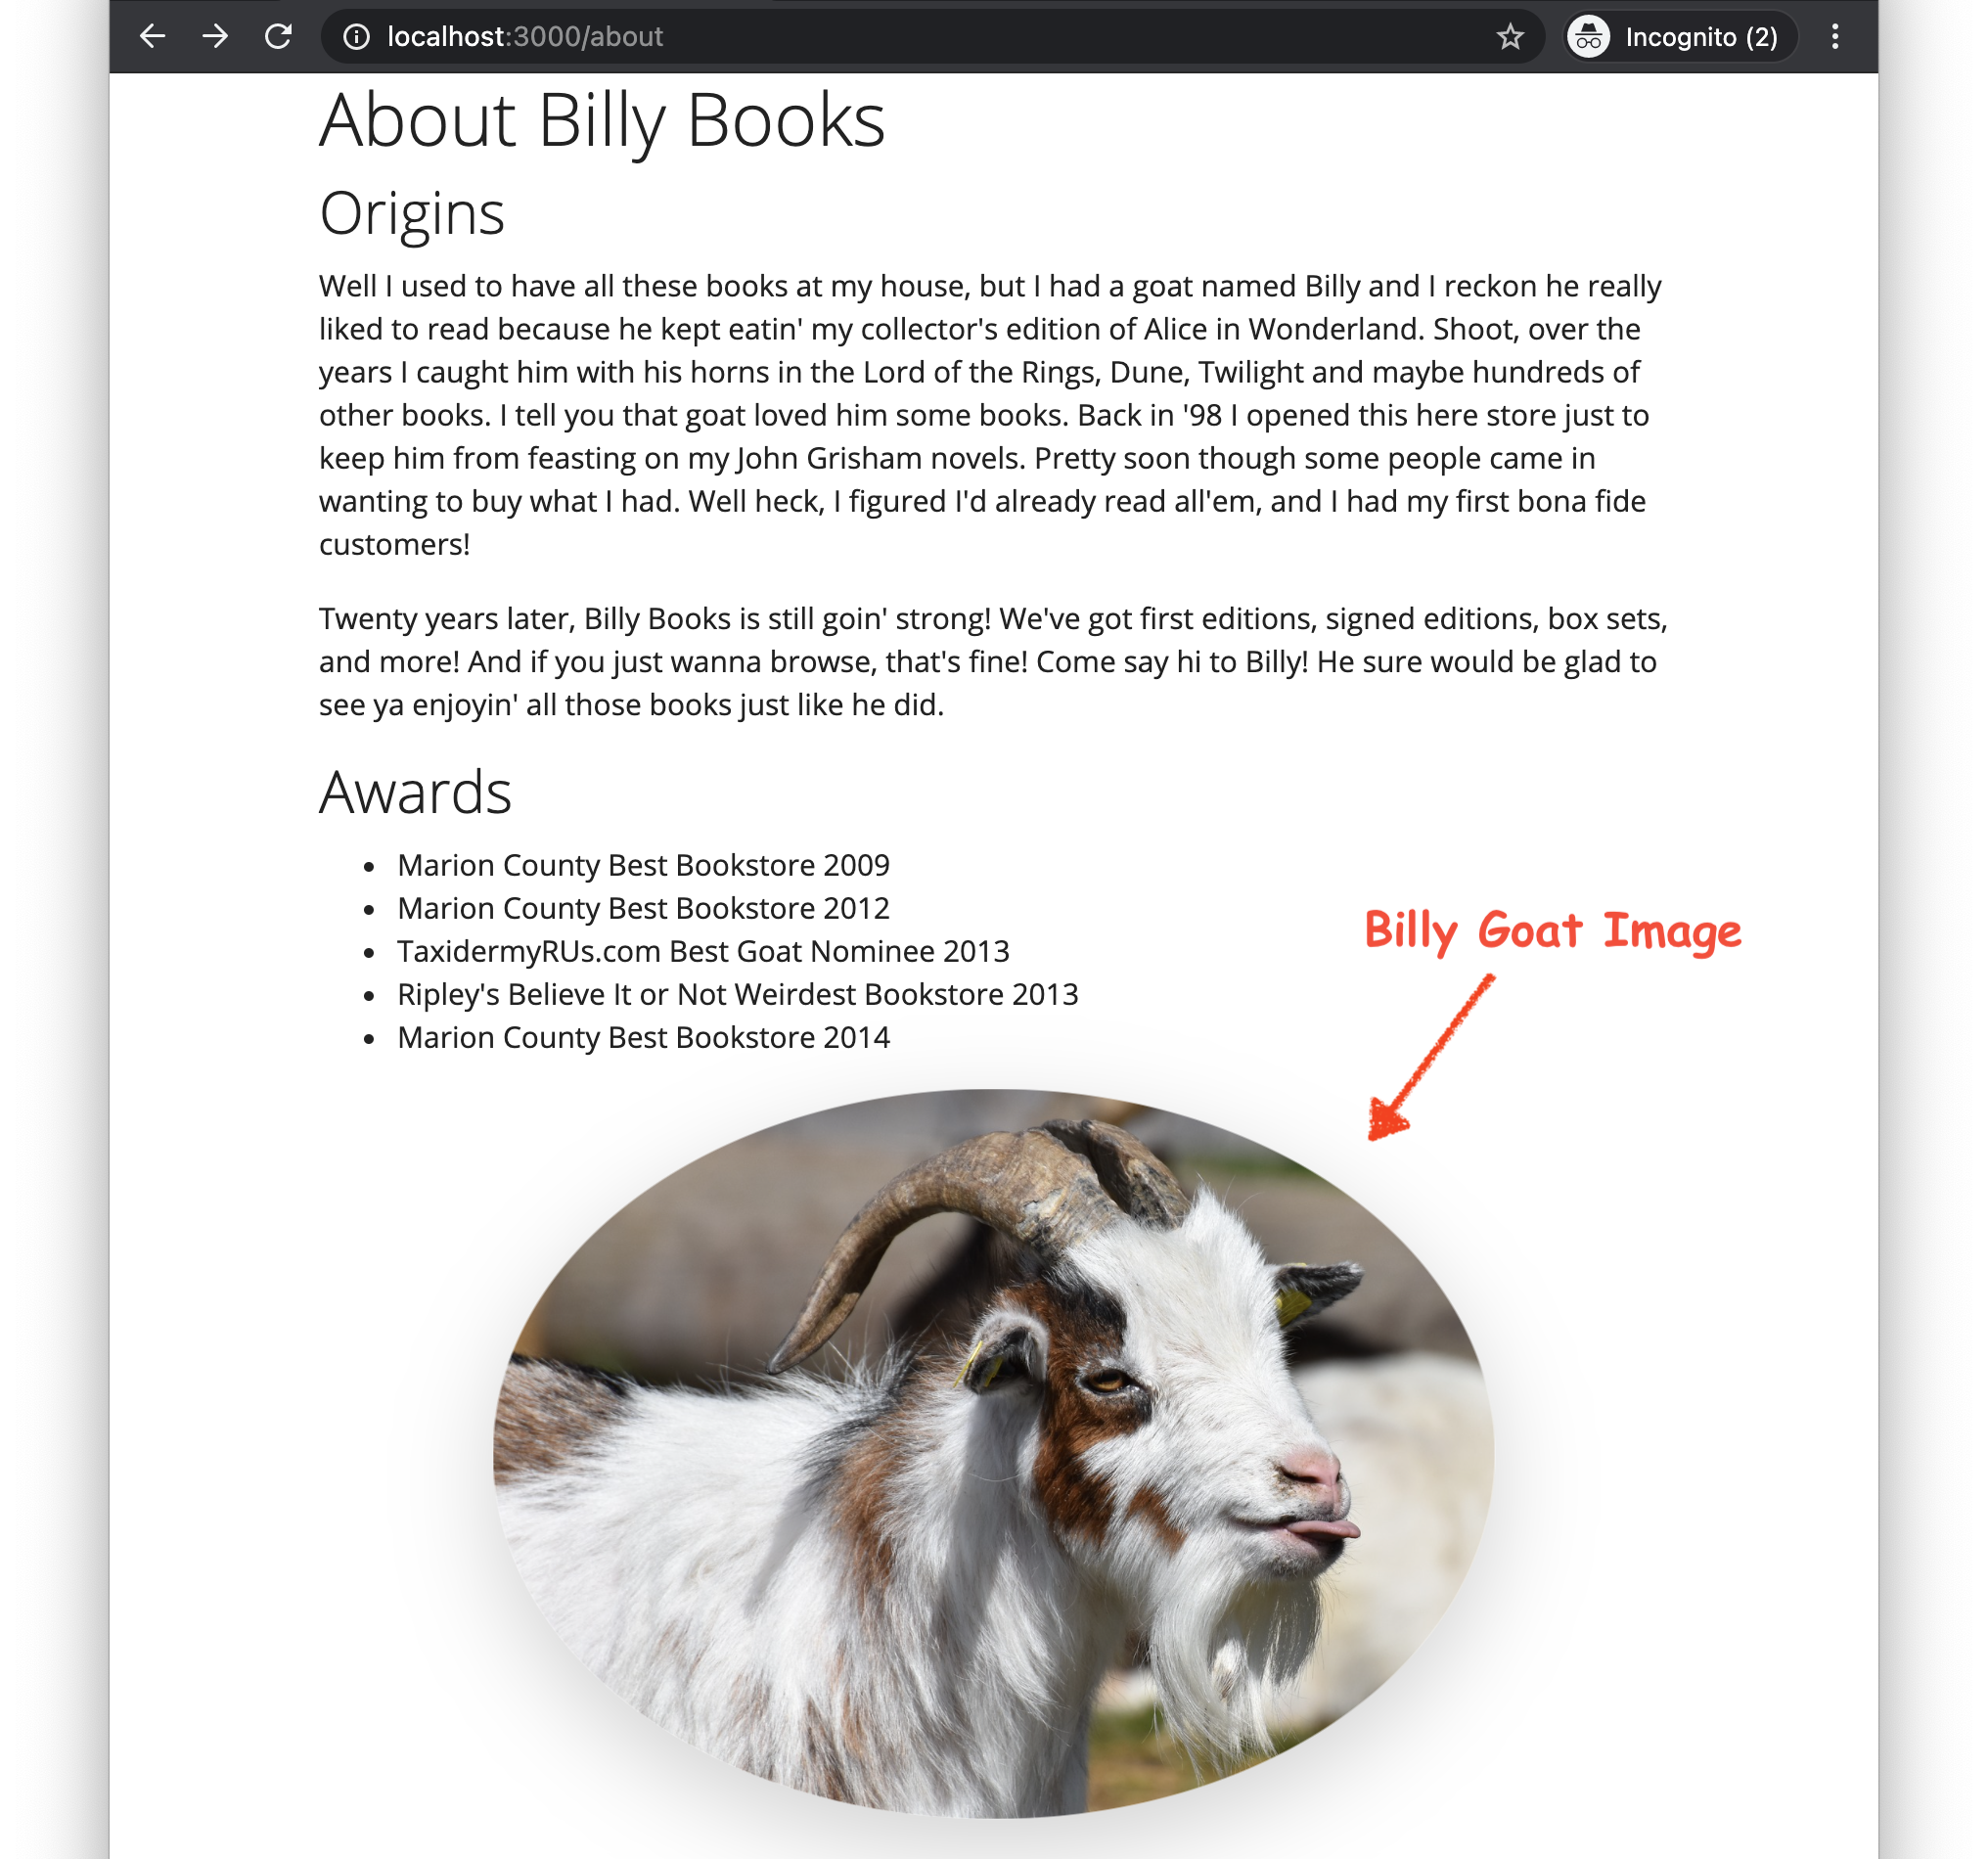
To demonstrate the steps for adding an image to an existing webpage, we will be adding a picture of a goat to the about page of the Billy Books bookstore base app, as illustrated in Figure 1.

Figure 1. The Billy Books about page with an image of Billy the Goat.
Step 1 Import the Image File
The goat image that will be added to the about page can be downloaded from this URL.
To add the goat image to project, we save the image file in the project directory app/assets/images/. Putting the image in this directory will make the image available for the app’s webpages to display.
Test It!
To confirm that we correctly added the image to the project, we run the web app (as per the steps in the running apps demo), and we open the following URL in our web browser:
The image of the goat should be displayed in the browser.
Note from the above URL that Rails automatically applies fingerprinting to the image file name, which causes a cryptographic hash based on the content of the image file to be added to the name of the file. This naming technique is beneficial for caching, because if the content of the image changes, its file name will also change.
Step 2 Display the Image
To display the goat image on the Billy Books about page, we add a call to the Rails image_tag view helper to the bottom of the view template app/views/pages/about.html.erb, like this:
<%= image_tag 'BillyGoat.jpg' %>
Note that we do not use plain old HTML for images; instead, we use the Rails image_tag view helper method to generate the HTML <img> element. One reason for using the helper is that the image_tag method automatically translates the filename (BillyGoat.jpg) to the fingerprinted version (mentioned above) that is required in order to display the image. In particular, the image_tag method returns a string containing the HTML code, and surrounding the call in the <%= … %> embedded Ruby tag (note the =) causes the returned string to be rendered directly onto the page.
Test It!
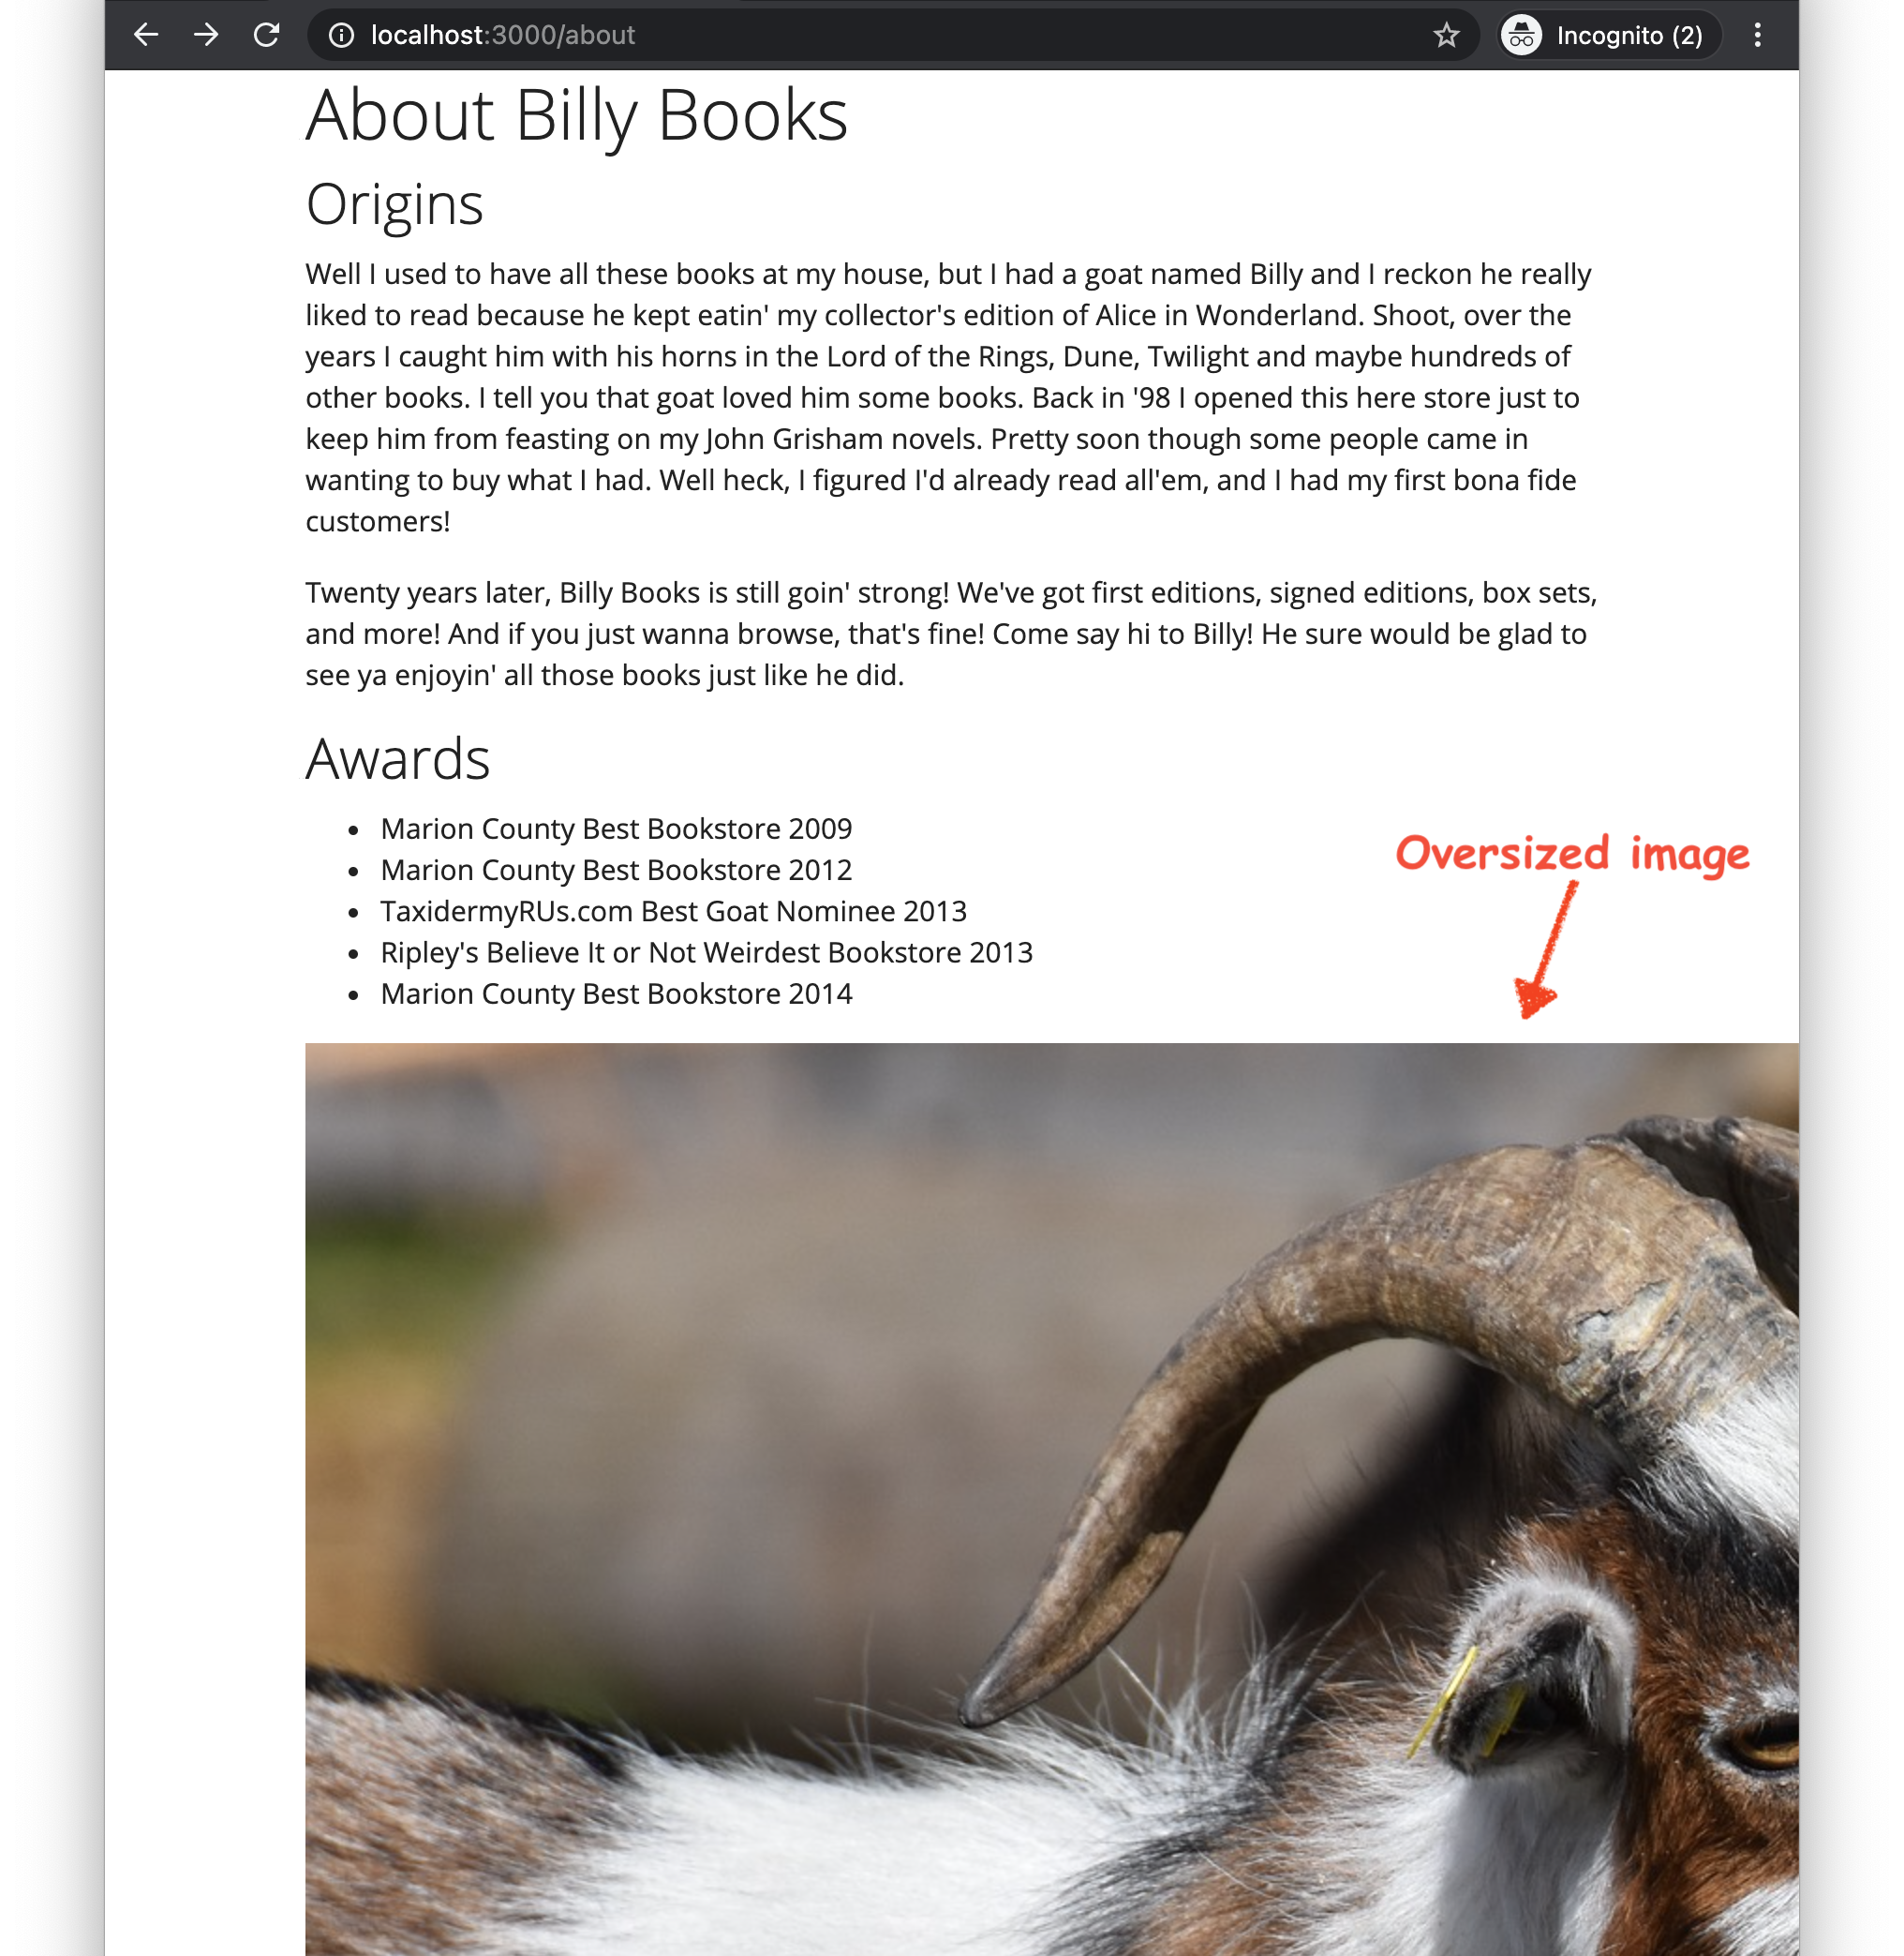
To confirm that we made this change correctly, we run the web app (as per the steps in the running apps demo), and we open the URL http://localhost:3000/about in our web browser. The webpage displayed should look exactly like Figure 2 below.

Figure 2. The Billy Books about page with an unstyled (and as a consequence, oversized) image of Billy the Goat.
Note that the image is currently oversized on the webpage, because we haven’t scaled it yet. In the next step, we will shrink it down to size and apply other styling as well.
Step 3 Style the Image
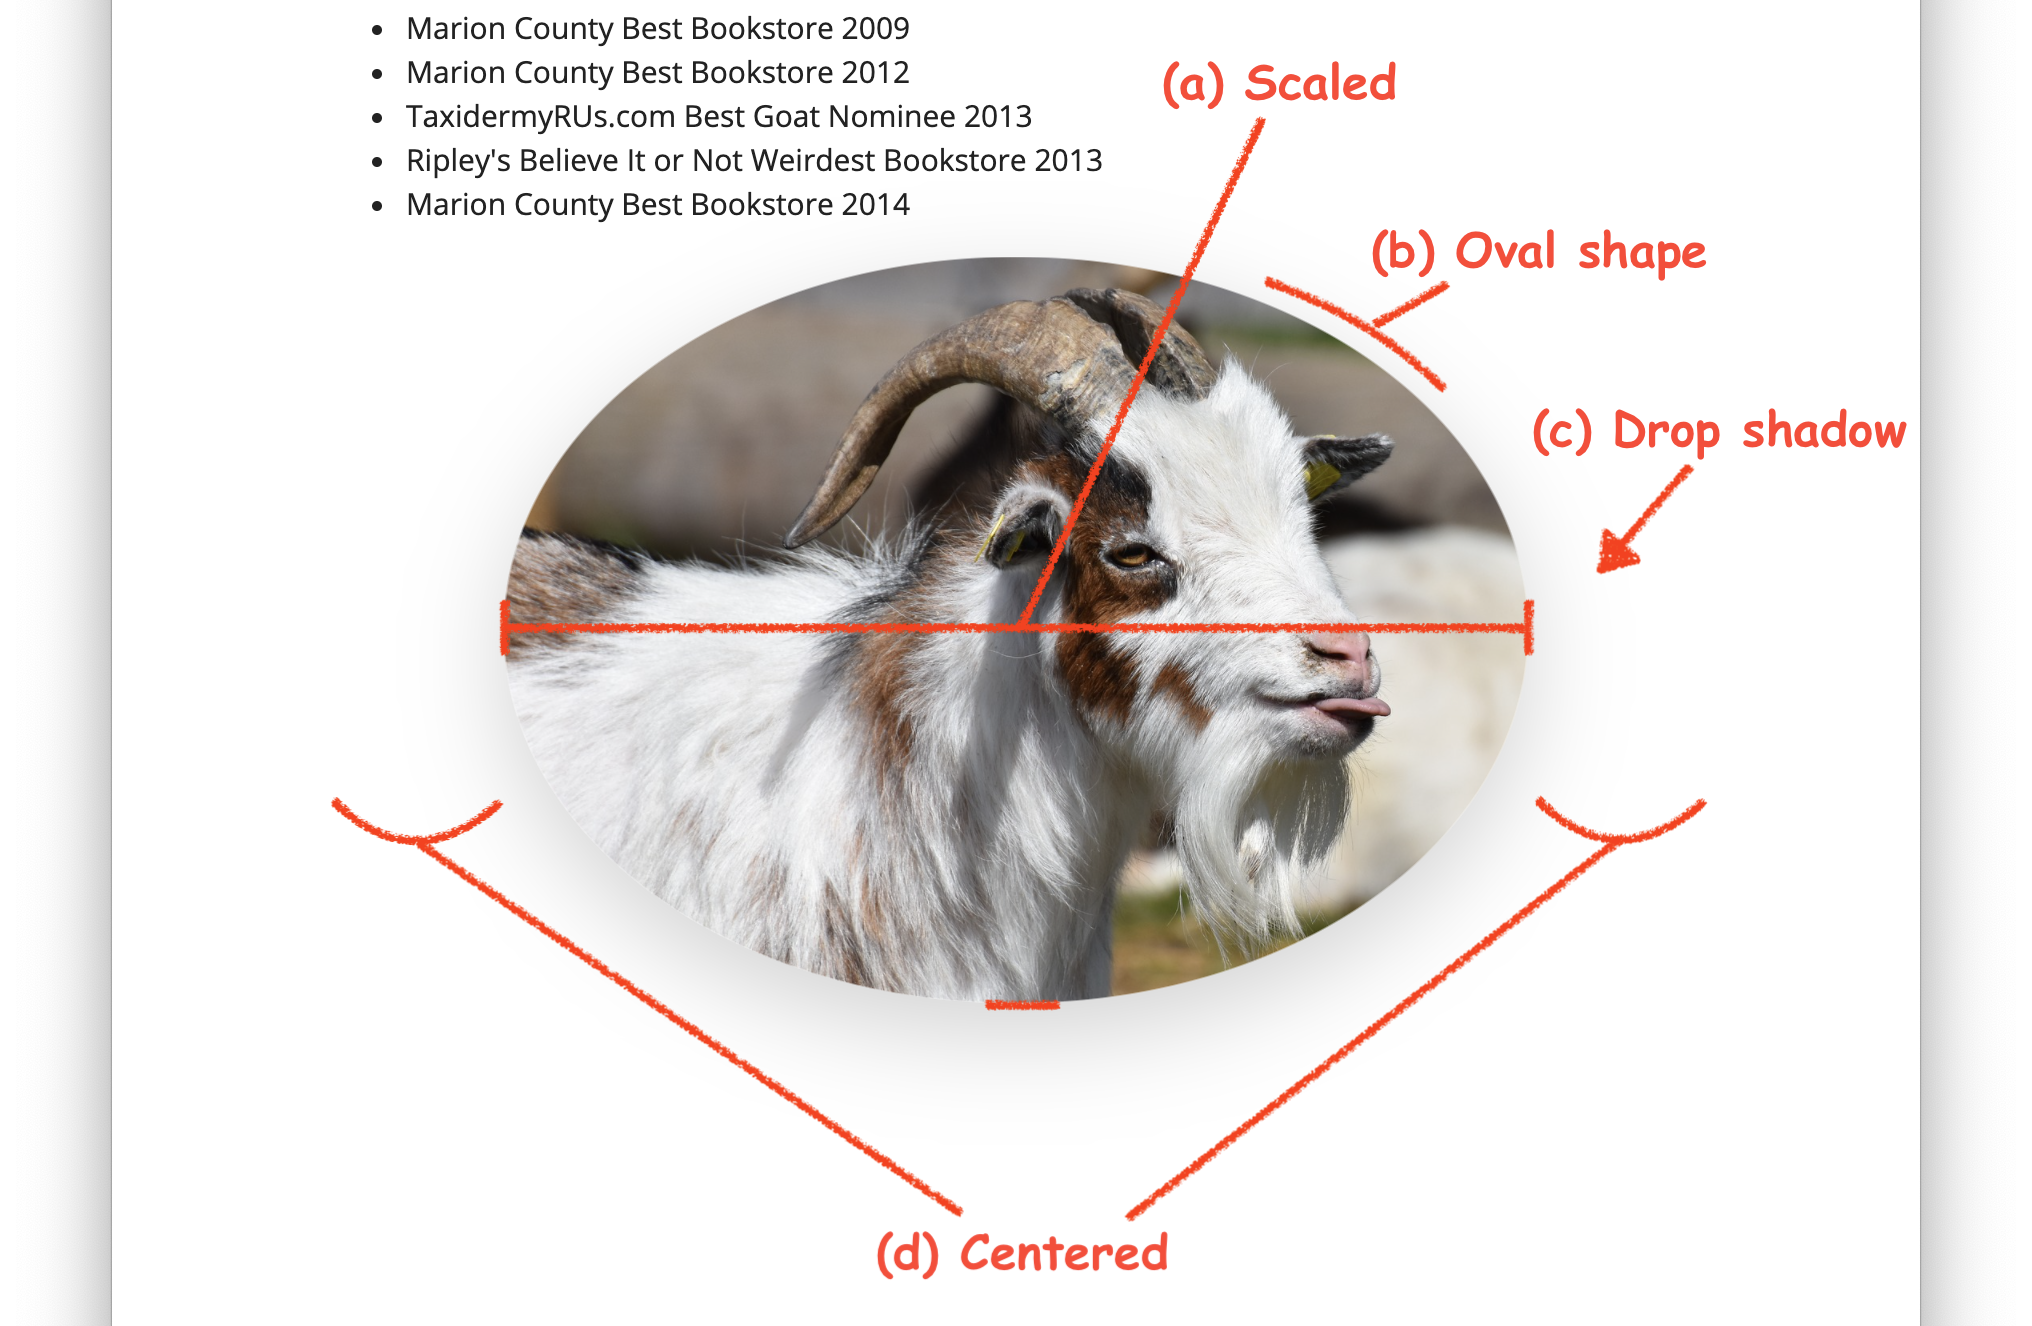
To make the picture fit on the page and to customize its appearance, we will apply the formatting and styling shown in Figure 3.

Figure 3. The Billy the Goat image annotated with all the style customizations to be made.
Substep
Scale the image. To shrink the size of the image so it fits better on the webpage, as shown in Figure 3a, we add CSS to the image_tag call, like this:
<%= image_tag 'BillyGoat.jpg',
  class: 'w-100',
  style: 'max-width: 32rem;'
%>
The class: argument adds the Bootstrap CSS class w-100 to the generated <img> element. The w-100 class has the effect of scaling the image so that its width is 100% of the width of the surrounding container element. To prevent the image from becoming too large, we also add a style: argument that adds a style attribute to the generated <img> element. In this case, the style attribute applies the CSS max-width: 32rem, which prevents the image from scaling larger than 32 rem units wide. (Each rem unit is the size of the ‘m’ character relative to font-size of the root <body> element.)
Substep
Give the image an oval shape. To change the shape of the image from a rectangle to an oval, as shown in Figure 3b, we add the Bootstrap CSS class rounded-circle to the class: argument, like this:
<%= image_tag 'BillyGoat.jpg',
  class: 'w-100 rounded-circle',
  style: 'max-width: 32rem;'
%>
Substep
Add a drop shadow. To give the image a drop shadow, as shown in Figure 3c, we add the Bootstrap CSS class shadow-lg to the class: argument, like this:
<%= image_tag 'BillyGoat.jpg',
  class: 'w-100 rounded-circle shadow-lg',
  style: 'max-width: 32rem;'
%>
Substep
Center the image. To center the image horizontally on the webpage, as shown in Figure 3d, we add the Bootstrap CSS classes d-block and mx-auto to the class: argument, like this:
<%= image_tag 'BillyGoat.jpg',
  class: 'w-100 rounded-circle shadow-lg d-block mx-auto',
  style: 'max-width: 32rem;'
%>
The above classes center the image by making it display as a block and adjusting its left and right margins so that the block is centered horizontally. The d-block class has the effect of setting the CSS display property of the generated <img> element to block. By default, <img> elements have the display property of inline, and thus, cannot be centered by adjusting their margins. The mx-auto class has the effect of setting the CSS margin-left and margin-right properties of the generated <img> element to auto, which automatically adjusts the margins to center the block. (In the mx part of mx-auto, the m is short for margin, and the x is short for X-axis, implying horizontal.)
Test It!
To confirm that we made this change correctly, we run the web app (as per the steps in the running apps demo), and we open the URL http://localhost:3000/about in our web browser. The webpage displayed should look exactly like Figure 1.
Conclusion
Following the above steps, we have now added an image to the about page of the Billy Books bookstore app.