Passing Data from View to Controller with Simple Forms
In this demonstration, I will show how to pass data collected with a form in the view to the controller action for processing. We will continue to build upon the QuizMe project from the previous demos.
In particular, the form will appear within a Contact page, as depicted in Figure 1, that will be used to collect user feedback on the app.
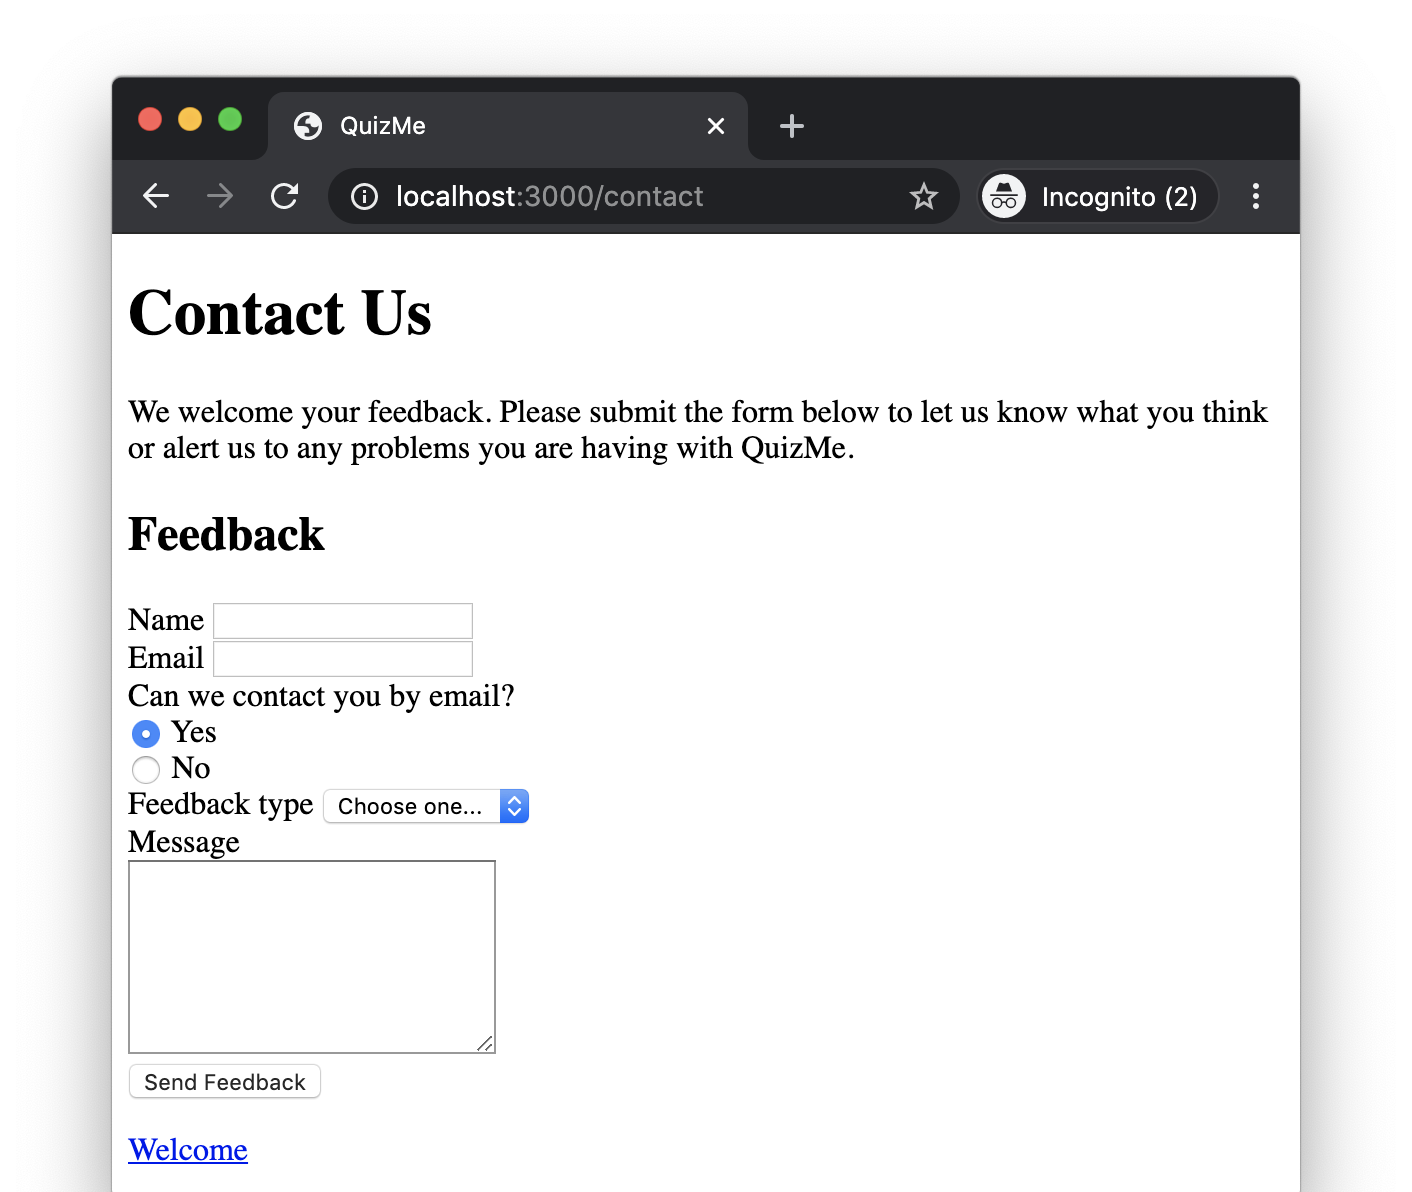
Figure 1. The Contact page with the feedback form.
1. Adding the Contact Page to Hold the Feedback Form
In this part, we will create the new Contact page that will later hold the form. This part involves only tasks that have already been covered in a previous demo.
Add a new Contact page to house form QuizMe users can use to send feedback to the developers. The Contact page should have the URL http://localhost:3000/contact. Creating the page involves adding a new route, a new controller action (contact), and a new view (contact.html.erb). The contact.html.erb view should start with the following base content:
<h1>Contact Us</h1>

<p>We welcome your feedback. Please submit the form below to let us know what you think or alert us to any problems you are having with QuizMe.</p>

<h2>Feedback</h2>

<!-- Feedback form will go here -->

<p><%= link_to 'Welcome', welcome_path %></p>
Additionally, add a link to the Contact page to the bottom of the Welcome page, so users can get to the Contact page.
2. Rendering the Feedback Form
In this part, we will build the form depicted in Figure 1. The form will collect a users’ name, email, whether someone from QuizMe is allowed to contact them at the provided email, the kind of feedback they want to leave, and their message. For now, users will be able to fill out the form, as depicted in Figure 2, but the app will not yet handle submissions of the form.
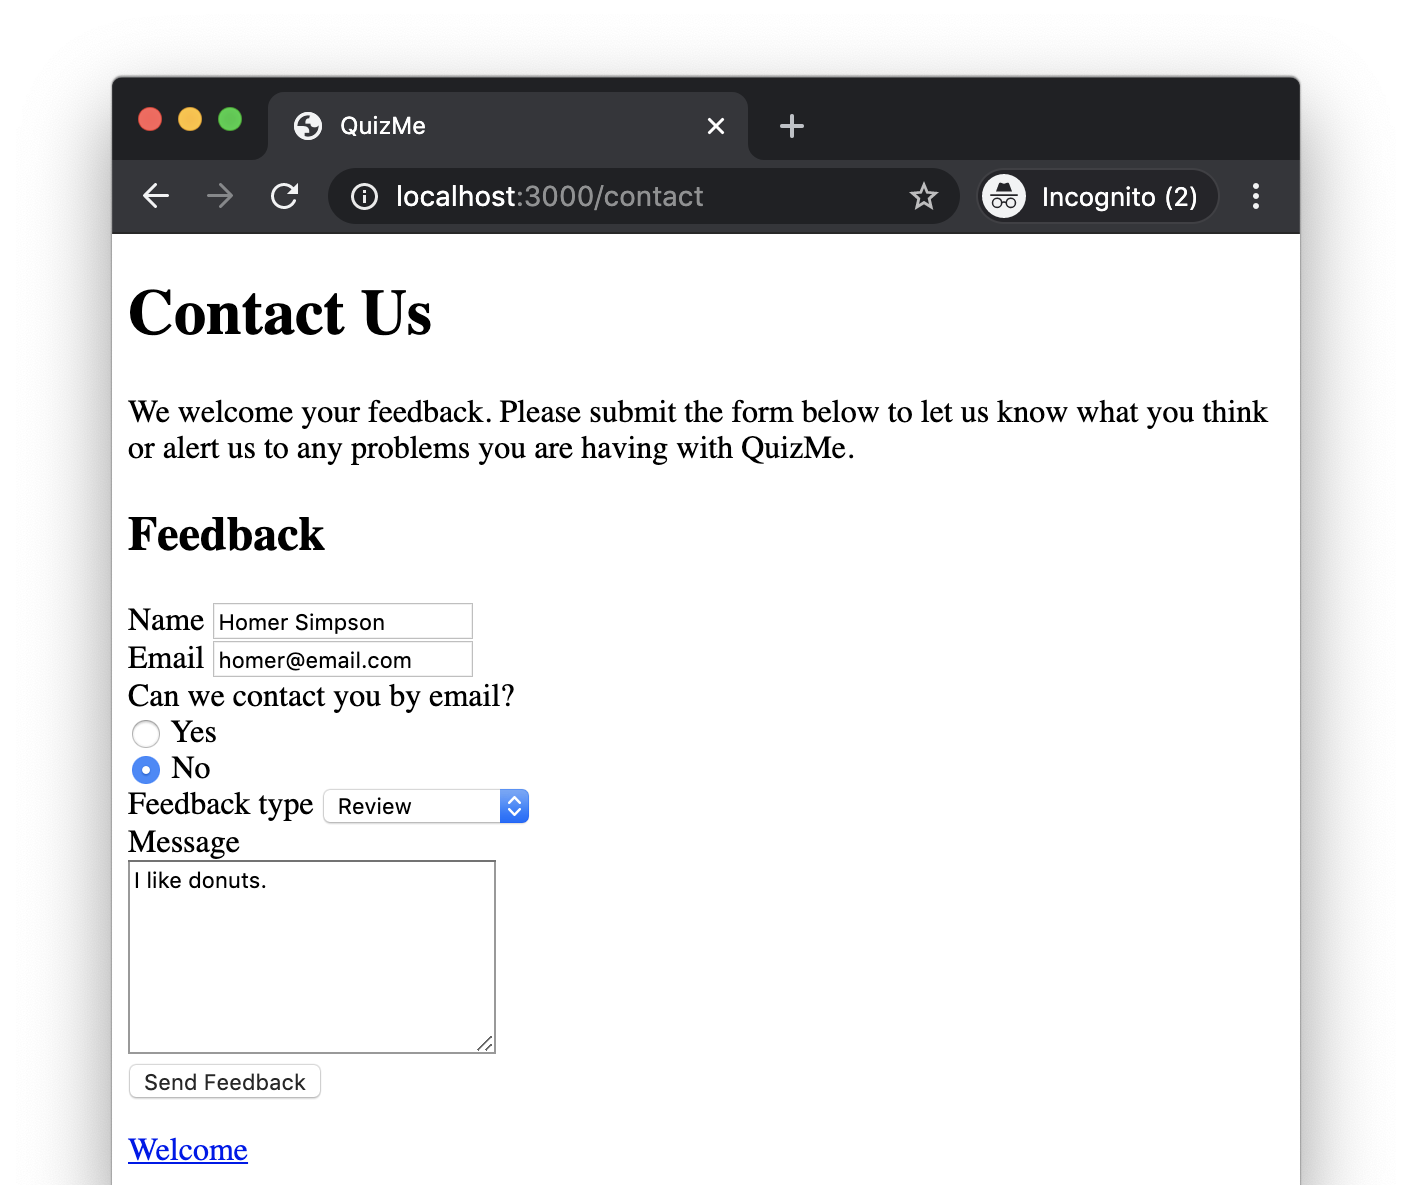
Figure 2. The Contact page with the feedback form filled in with data.
-
Create a new POST route for the URL http://localhost:3000/contact that points to a new
leave_feedbackaction in theStaticPagesControllerclass, and name the new route'leave_feedback'. The new route should look like this:post 'contact', to: 'static_pages#leave_feedback', as: 'leave_feedback' -
Create the
leave_feedbackaction in theStaticPagesControllerclass. It should return an HTML response that renders thecontact.html.erbview. The action should look like this:def leave_feedback respond_to do |format| format.html { render :contact } end end -
In the
contact.html.erbview, replace the form placeholder comment with a form block using theform_withhelper. Specify that the form should send a POST request to theleave_feedback_pathURL by setting theurlandmethodarguments ofform_with. By default,form_withexpects the action to return a JavaScript response in therespond_toblock; however, in this case, we need an HTML response. To make the form expect an HTML response, we use thelocal: trueargument. Thus, the form block should look like this:<%= form_with url: leave_feedback_path, local: true, method: :post do %> <% end %>Notice that
<%= ... %>elements (with an=) are used for these form helper functions, because the form helpers return raw HTML that we want displayed in the browser. -
Use the following form helper methods to add the form fields to the
form_withblock. API documentation for these helper methods can be found here.-
Add a text field for the users’ name that looks like this:
 <div>
   <%= label_tag "name" %>
   <%= text_field_tag "name", nil %>
 </div>
The
text_field_tagoptions are the field id ("name") and the value in the field (nilat first). Thelabel_tagID should always match its paired form field ID ("name").Also, in case you are not familiar, a
divHTML element is just a container for other HTML elements, so you can logically group them. -
Add an email field for the users’ email that looks like this:
 <div>
   <%= label_tag "email" %>
   <%= email_field_tag "email", nil %>
 </div>
The
email_field_tagarguments are the field ID ("email") and the value in the field (nilat first). -
Add a radio button group for whether or not someone from QuizMe is allowed to contact the user at the provided email. The group should have yes/no options and look like this:
 <div>
   <span>Can we contact you by email?</span>
   <div>
     <%= radio_button_tag "reply", true, true %>
     <%= label_tag "reply_yes", 'Yes' %>
   </div>
   <div>
     <%= radio_button_tag "reply", false, false %>
     <%= label_tag "reply_no", 'No' %>
   </div>
 </div>
Similar to a
div, aspanis an HTML container, usually used to wrap some subset of a block of text.Radio buttons are used as a group such that the response from the user can be only one of multiple preset options, and only the chosen value will be submitted when the form is submitted. The above radio button has two options,
'Yes'and'No', which I will represent with the boolean valuestrueandfalse. Each option needs to have its ownradio_button_tagthat controls the value passed back when the form is submitted and alabel_tagthat specifies the string the user sees for each option.The
radio_button_tagoptions are: - the field ID ("reply") which must be the same for all buttons in the group. - the value to be returned if this button is checked when the form is submitted (the booleantruein this case, although radio buttons can be set up to return data of any type). - a boolean for whether the button is checked. In this case, we want'Yes'to be the default option so that button is initially set to be checked and the other is not.For a group of radio buttons, the
label_tagoptions should include a unique ID and the display value. The display value in thelabel_tagdoes not need to be the same as the return value from theradio_button_tag. By custom, the ID should be the name of the group ("reply") followed by an underscore (_), then a unique string for each option. I chose to use the display values (yesandno) as the unique string, but it could just as easily have been something else, like the return values (trueandfalse). -
Add a dropdown list for the kind of feedback the user wants to leave, either a review or a bug report. The dropdown should show the default message “Choose one…” when nothing has been selected. The code for the dropdown should look like this:
 <div>
   <%= label_tag "feedback_type" %>
   <%= select_tag "feedback_type", options_for_select([ "Review", "Bug Report" ]), prompt: 'Choose one...' %>
 </div>
Functionally, dropdown lists are similar to radio buttons in that they allow the user to select one item from a set of predetermined options. However, unlike the Rails helper for radio buttons, the
select_taghelper includes all options for the dropdown by passing them as an array of values ([ "Review", "Bug Report" ]) into theoptions_for_selectfunction. The default text in the dropdown is set using thepromptoption ('Choose one...'). As with most tag helpers, the first option is the field ID ("feedback_type"). -
Add a text area for the user’s message that matches:
 <div>
   <%= label_tag "message" %><br />
   <%= text_area_tag "message", nil, size: "27x7" %>
 </div>
An HTML text area is similar to a text field, but it instead allows multi-line user input. The options for the
text_area_taghelper are the field ID ("message"), the value in the field (nilat first), and the optionalsizeoption. By default, the text area can hold 2 rows of 21 characters but you can change those values by setting therows(R) orcols(C) options individually or using the size option to specify both in the form"CxR". -
Add a button to submit the feedback form. The button’s code should look like this:
<%= submit_tag "Send Feedback" %>The
submit_tagactually creates an HTML input tag (<input type="submit"></input>) instead of a button, but visually it still looks like a button when rendered in the browser.The main
submit_tagargument is the text that the button will display ("Send Feedback").Reload the Contact page and confirm that the form appears as depicted in Figure 1.
-
3. Processing User-Submitted Form Data in the Controller
In this part, we will make the leave_feedback controller action process the user data submitted via a form. All form fields will be required to accept a submission. Submitting the form will reload the Contact page with a status message that tells the user if the submission was valid, as depicted in Figure 3, or if they missed any fields.
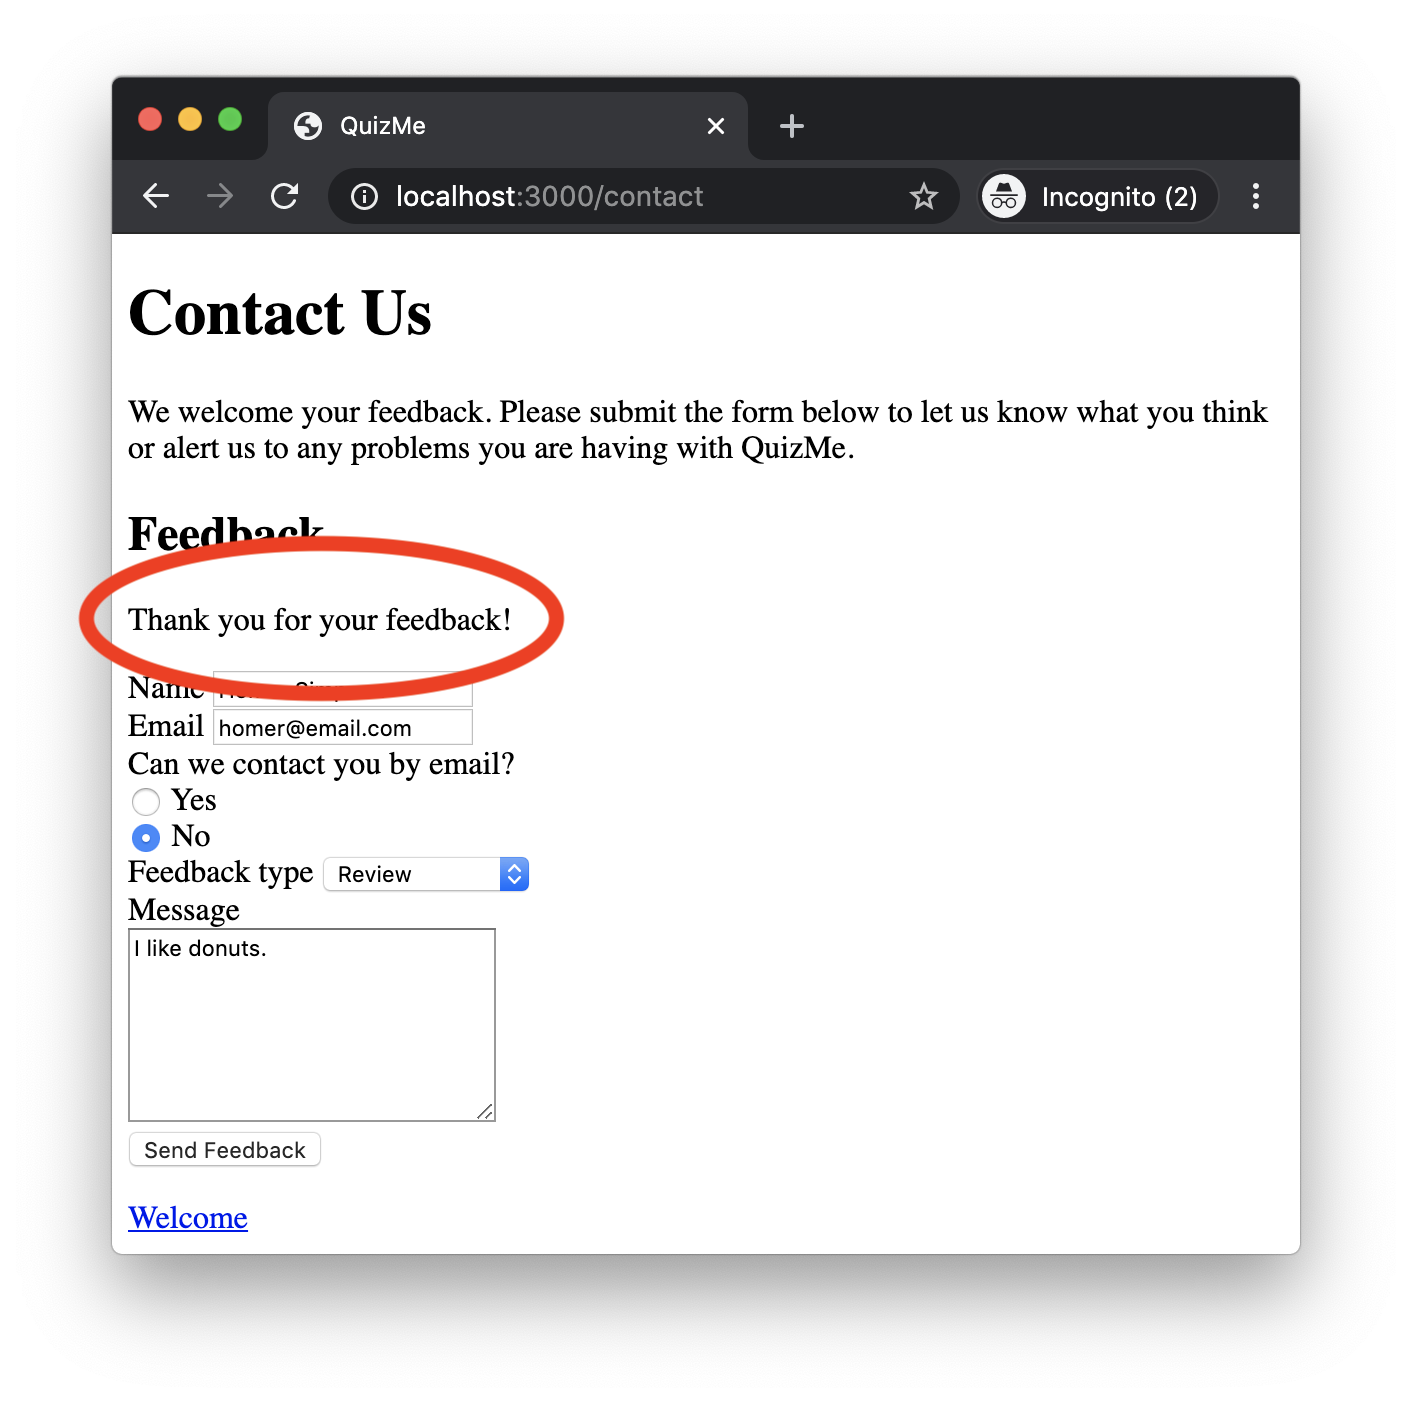
Figure 3. The Contact page with the feedback form that has been successfully submitted.
Form-input data is sent to the controller via the params hash. In Ruby, a hash is a key-value data structure (similar to a dictionary in Python). You can set values for all the keys in the hash using code like options = { font_size: 10, font_family: "Arial" }, or you can set or access a single value using code like options[:font_size]. When a form is submitted the field ID (key) and value of each form field is added to the params hash. Also, the params hash only uses string values, so even if the field takes an integer or a boolean it will be converted to a string. You need to be aware of this if you are doing comparisons in the controller.
The controller action should check if all required fields have a value other than nil or a blank string (i.e., one that is "" or contains only whitespace characters). If all fields have data, the user should be notified that their feedback has been accepted. If not, they should be told to fill out the remaining fields.
-
Check that all fields have been filled by setting a boolean variable
form_complete. This can be achieved by iterating over each form key and checking that it exists in the params hash and that it has a non-blank value. The code to do the checking should look like this:required = [:name, :email, :reply, :feedback_type, :message] form_complete = true required.each do |f| if params.has_key? f and not params[f].blank? # that's good news. do nothing else form_complete = false end endThe
has_key?method checks if the given key exists as a key in the hash. Then, you can check that the string value for that key is not nil or blank with theblank?method. -
After the app determines whether the form is complete and accepted, it passes an appropriate status message to the view. To set this up, do the following.
-
Set the status message in the controller based on the
form_completeboolean. The code should match:if form_complete form_status_msg = 'Thank you for your feedback!' else form_status_msg = 'Please fill in all the remaining form fields and resubmit.' end -
Pass the status message into the response by adding a new local variable to match:
format.html { render :contact, locals: { status_msg: form_status_msg } } -
Add code to
contact.html.erbbelow the Feedback heading to display the status message if it has been set. The code should look like this:<% if local_assigns.has_key? :status_msg %> <p><%= status_msg %></p> <% end %>Similar to the
paramshash, local variables available in the view are also stored in a hash calledlocal_assigns. You can use thehas_key?method to check that the status message has been set.
-
-
At this point, the user should be able to submit the form and see the response message. However, if the user is told the form was incomplete, the current version of the app requires them to re-enter their information for all the fields, not just the ones that were missing/invalid. We can fix this usability problem by passing the data from the
paramshash back into the view in a new hash local variablefeedback. Then, in the view, we can set the value of each form field based on thefeedbackhash. If a field has no value in thefeedbackhash, it will be set to the original default value for the field. The following steps set this up:-
In the
leave_feedbackcontroller action, add thefeedbackvariable to the response by changing the HTML response to look like this:format.html { render :contact, locals: { status_msg: form_status_msg, feedback: params } } -
In the
contactcontroller action, add thefeedbackvariable to the response by changing the HTML response to look like this:format.html { render :contact, locals: { feedback: {} } }This change is needed, because the
contact.html.erbview code will assume that afeedbackhash exists, so whenever the view is rendered, a hash must be passed in. However, the hash may be empty (as it is in this case). -
Change the fields’ values to come from the
feedbackhash if set and to use the default if not. Previously, we used thehas_key?method with anifstatement to optionally set this. We might try doing the same here using the following ternary operator:<%= text_field_tag "name", feedback.has_key?(:name) ? feedback[:name] : nil %>However, this change would need to be made for every field, and it could quickly become overly complicated. Instead, we will use the hash
fetchoperation to get the value for a key if the key exists, or to specify what value to return if the key is not found. Usingfetch, the code for all the fields should be updated to look like the following.The text fields and text area are fairly straightforward:
<%= text_field_tag "name", feedback.fetch(:name, nil) %><%= email_field_tag "email", feedback.fetch(:email, nil) %><%= text_area_tag "message", feedback.fetch(:message, nil), size: "27x7" %>With radio buttons, you need to make sure that the checked value is set based on the value for the
"reply"key. You also need to convert the true/false values to strings using theto_smethod before making the comparison, like this:<div> <%= radio_button_tag "reply", true, feedback.fetch(:reply, nil) == true.to_s %> <%= label_tag "reply_yes", 'Yes' %> </div> <div> <%= radio_button_tag "reply", false, feedback.fetch(:reply, nil) == false.to_s %> <%= label_tag "reply_no", 'No' %> </div>With dropdown selects, the selected option is the second parameter to the
options_for_selectmethod. If nothing is selected, it should be set to the empty string""(and notnil), like this:<%= select_tag "feedback_type", options_for_select([ "Review", "Bug Report" ], feedback.fetch(:feedback_type, "")), prompt: 'Choose one...' %>
-
We should now have a working form that users can use to easily enter their feedback and see if it has been accepted. We will see in the next few demos how to further improve this form by using remote form submission (to stop the page from reloading every time the form is submitted) and using so-called flash messages (to display a more dynamic status message). Of course, at this point, a big omission to the feedback form feature is having it actually do something useful with the submitted data, like saving the data. Upcoming demos will also cover a variety of ways to save and process such form data.