Forms and Actions for Updating Model Records
In this demonstration, I will show how to add controller actions and views that allow users to update existing database records. We will continue to build upon the QuizMe project from the previous demos.
In particular, we will implement an edit form page, as depicted in Figure 1.
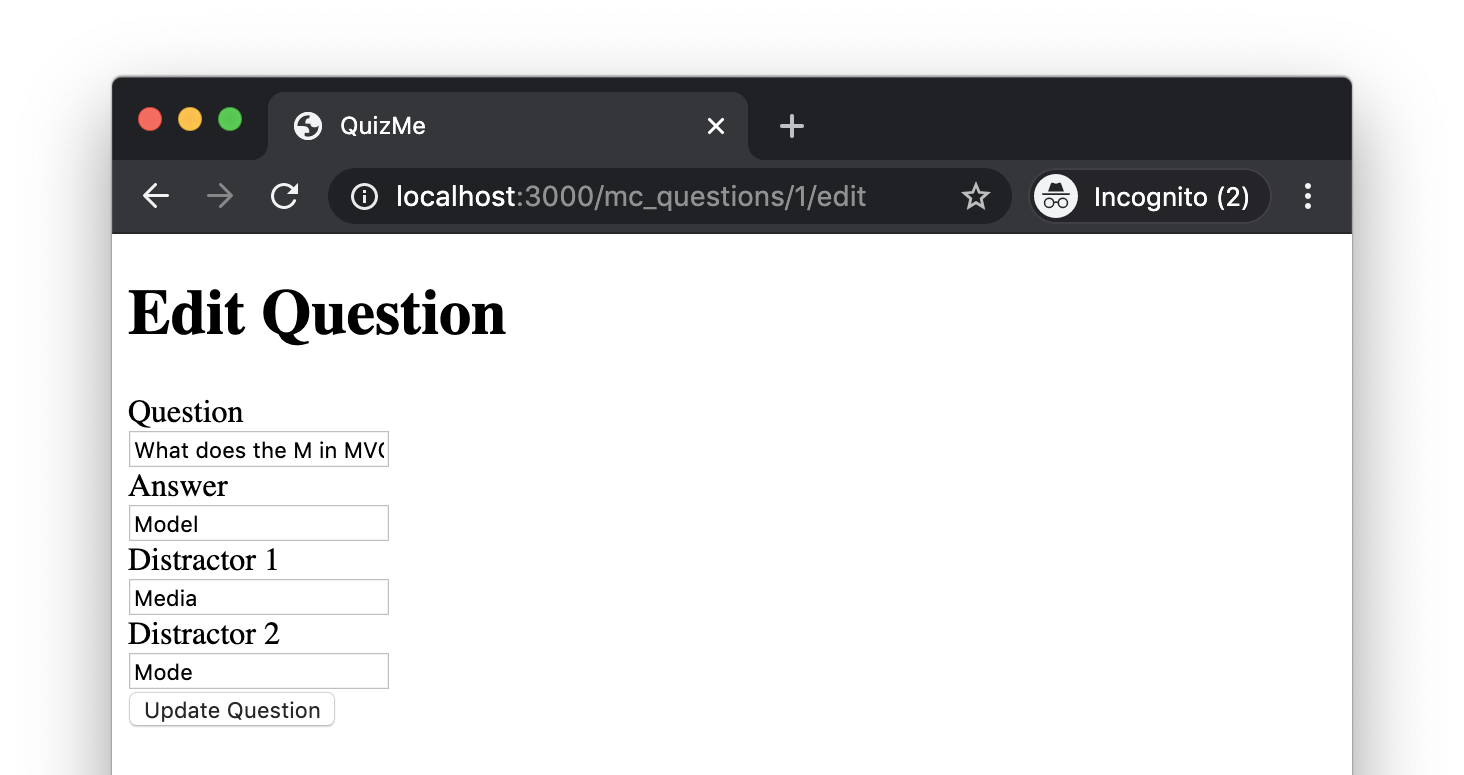
Figure 1. An edit form page for updating existing multiple-choice questions.
An update controller action will process submissions of the form. Successful submissions of the edit will update the database record and will redirect the browser to the index page, displaying a success flash notification, as depicted in Figure 2.
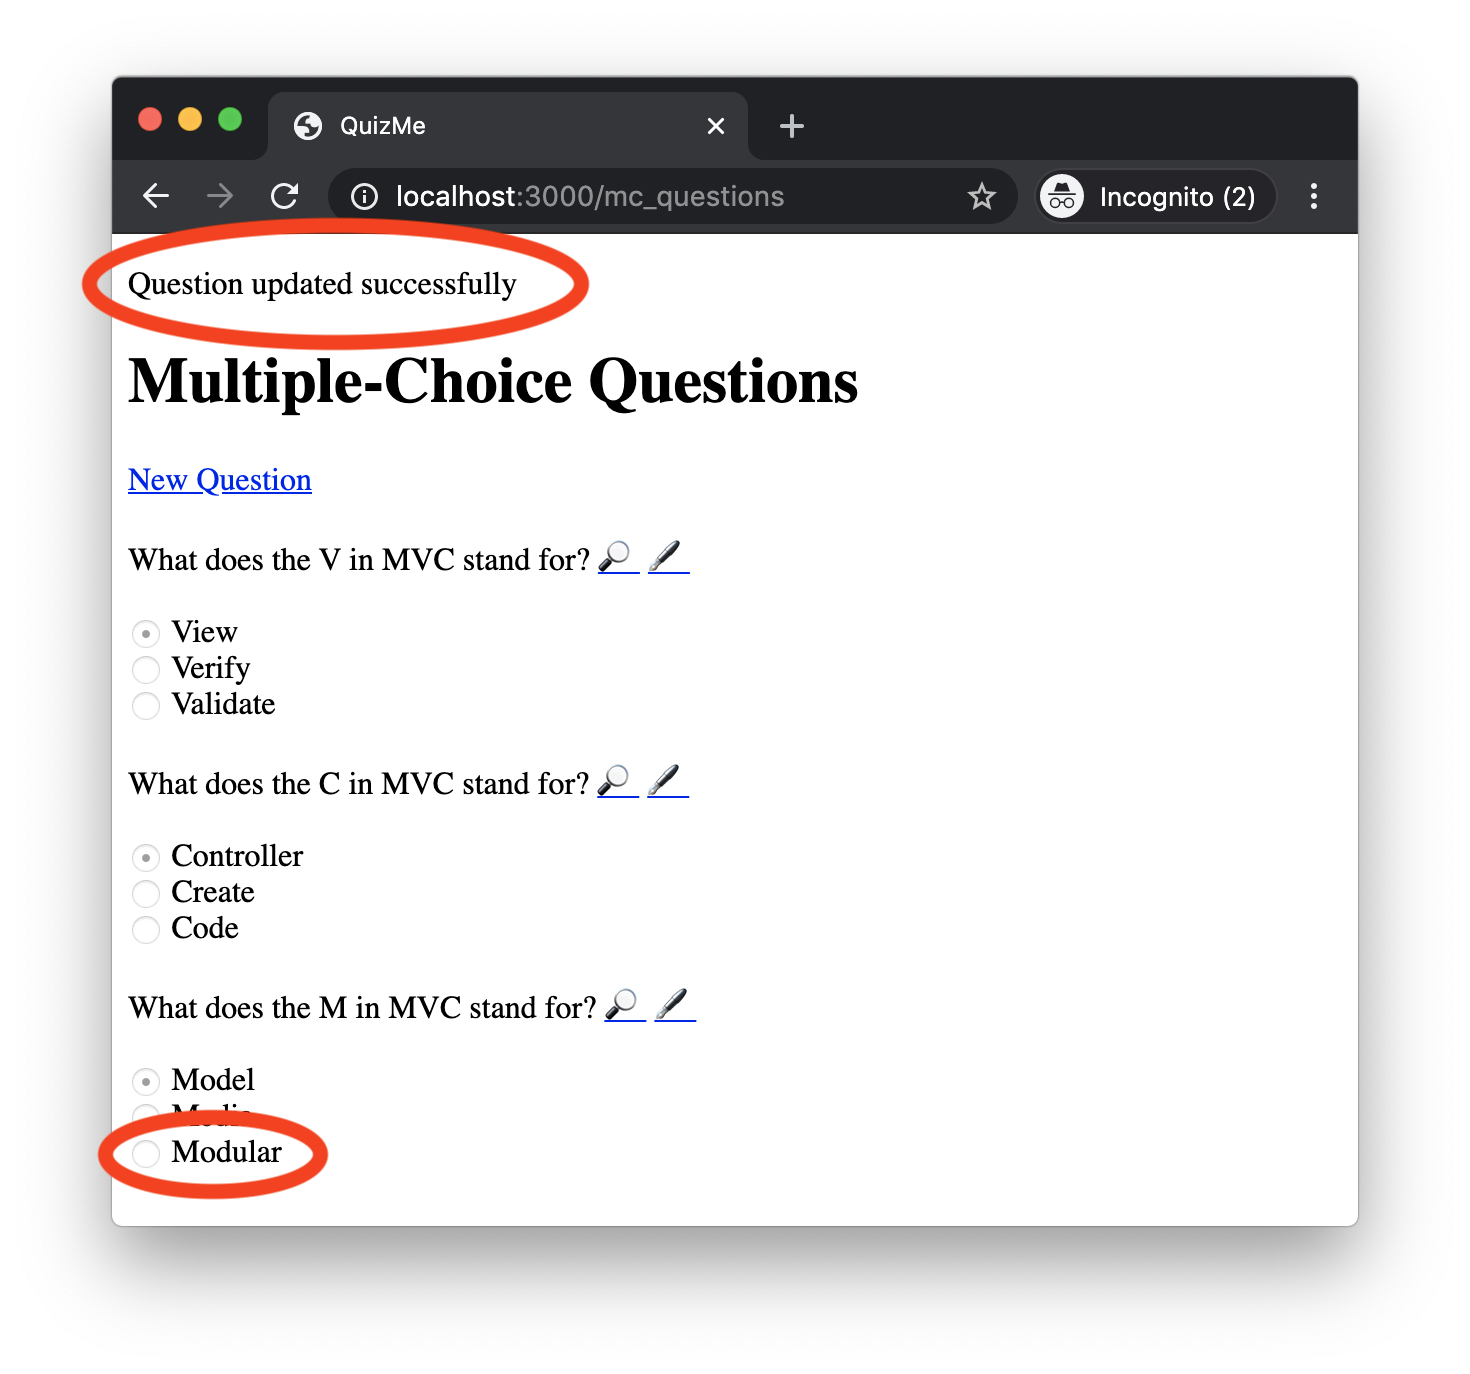
Figure 2. An index page after the successful update of a multiple-choice question, including a success notification message and the updated question data.
If the form submission fails (e.g., because a model validation fails), the update controller action will re-render the edit form, displaying an error notification, as depicted in Figure 3.
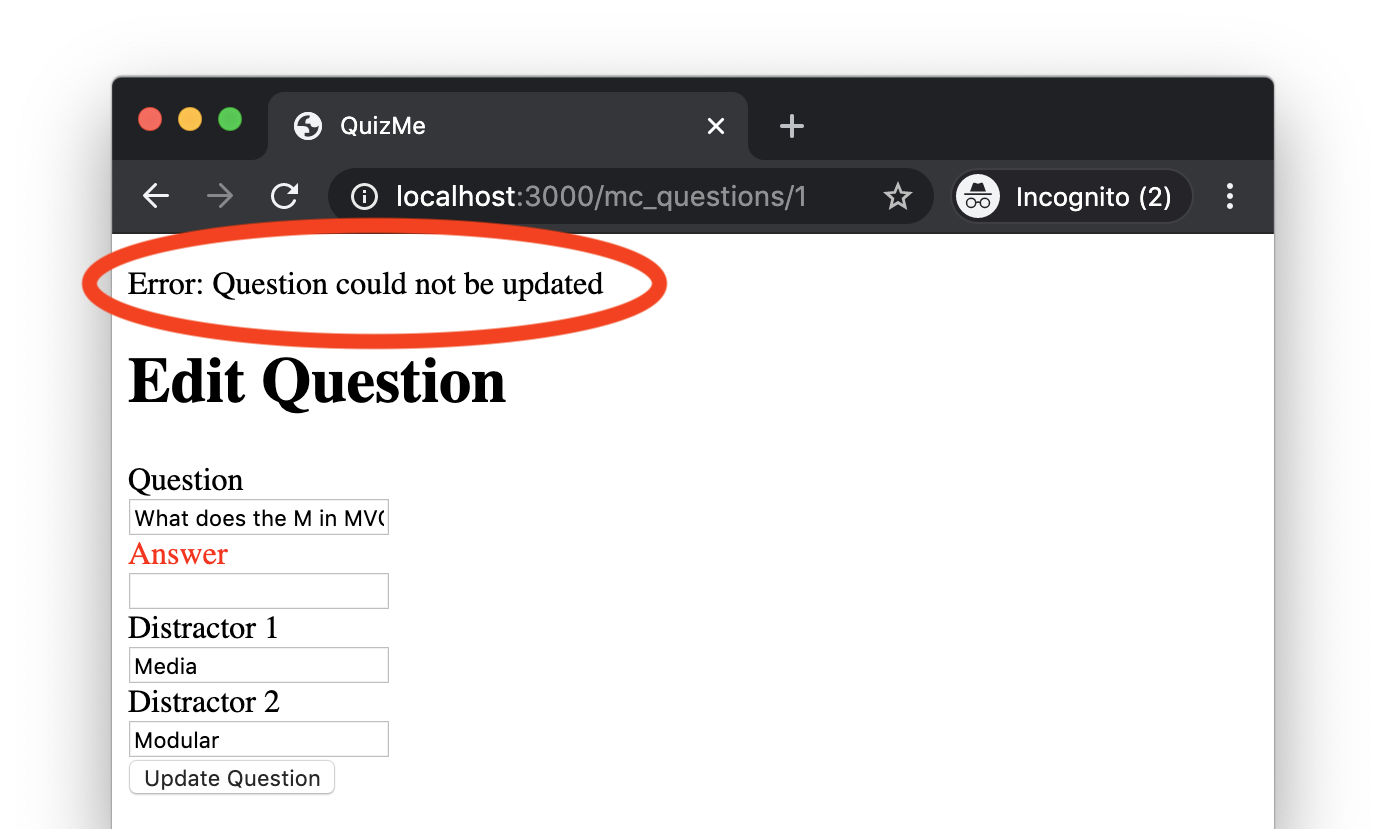
Figure 3. The edit form page after a failed submission of the form.
Additionally, to make the edit form more accessible to users, we will add hyperlinks to the index and show pages, as depicted in Figure 4.
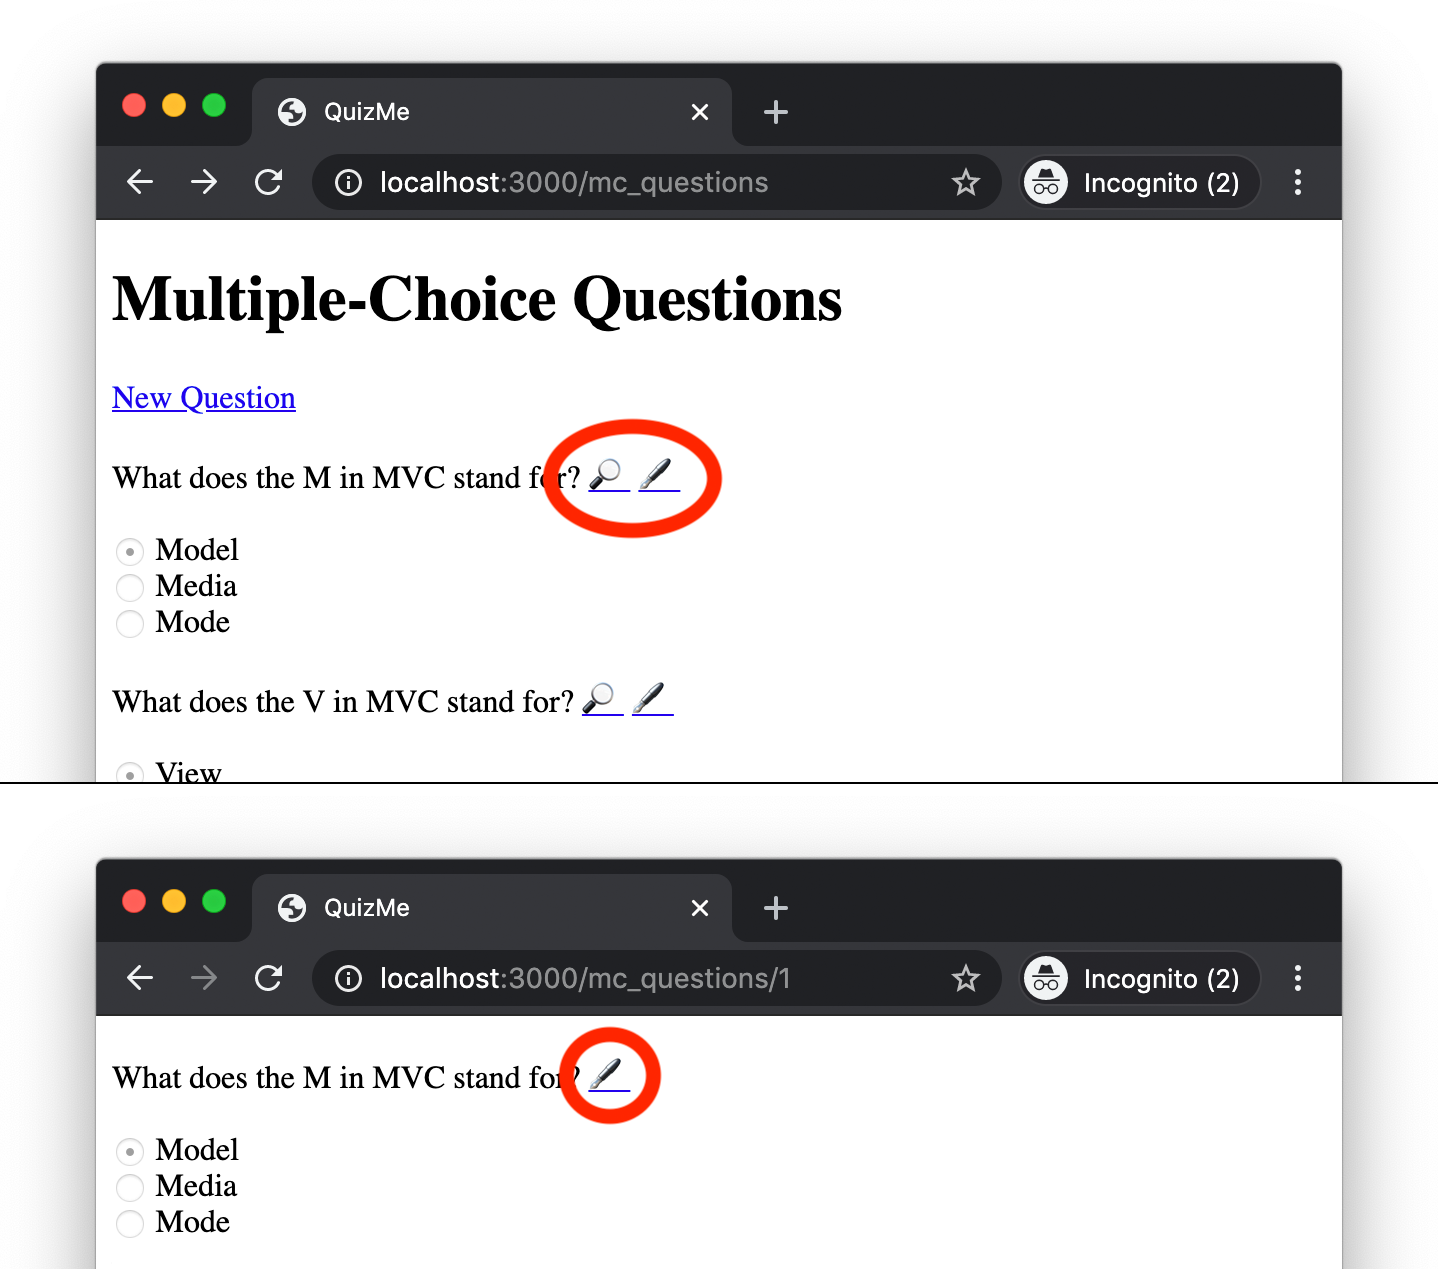
Figure 4. The index and show pages, now with hyperlinks (🖋) to the edit form. Additionally, the index page now also has hyperlinks (🔎) to the show pages.
The edit/update functionality described above will be similar to the new/create functionality from the previous demo, and like the previous demo, there will be three main parts to this demo:
- We will first implement the
editcontroller action andedit.html.erbview for displaying the form page from Figure 1 (however, the form will not yet be functional). - Next, we will implement the
updatecontroller action for processing submissions of the form, and thus, make the form functional. - Finally, we will add to the
indexandshowpages hyperlinks to theeditform page.
1. Rendering the edit Form Page for McQuestion Records
As a first step, add to routes.rb the standard resource route for the edit action, inserting it after the show route, like this:
get 'mc_questions/:id/edit', to: 'mc_questions#edit', as: 'edit_mc_question' # edit
Next, in the McQuestionsController class, create an edit action that will retrieve the McQuestion record with the id given in the request URL, and then, will render the edit.html.erb view, passing to it the McQuestion object, like this:
def edit
  question = McQuestion.find(params[:id])
  respond_to do |format|
    format.html { render :edit, locals: { question: question } }
  end
end
The find method is part of the Rails model API. It retrieves model records of the corresponding type (in this case McQuestion) from the database based on their id values. The argument passed to the find call above is params[:id]. This code retrieves from the params hash the ID value that was given in the HTTP request URL. The :id symbol used here corresponds to the :id symbol from URI pattern in the edit route.
Finally, create an edit.html.erb file in app/views/mc_questions, and give it code similar to the new.html.erb view, like this:
<h1>Edit Question</h1>

<%= form_with model: question, url: mc_question_path, method: :patch, local: true, scope: :mc_question do |f| %>

  <div>
    <%= f.label :question %><br>
    <%= f.text_field :question %>
  </div>

  <div>
    <%= f.label :answer %><br>
    <%= f.text_field :answer %>
  </div>

  <div>
    <%= f.label :distractor_1 %><br>
    <%= f.text_field :distractor_1 %>
  </div>

  <div>
    <%= f.label :distractor_2 %><br>
    <%= f.text_field :distractor_2 %>
  </div>

  <%= f.submit 'Update Question' %>

<% end %>
This code is largely the same as in new.html.erb from the previous demo, except for the following changes:
- The heading text has changed to “Edit”, and the submit button text has been changed to “Update”.
- The
form_withhelper’smethodoption has changed to:patchso that submitting the form will produce an HTTP PATCH request (the appropriate HTTP verb for updating a record). - The
form_withhelper’surloption has changed tomc_question_path, the route helper defined by theshowroute. This is the resource path that will be included in the HTTP PATCH request sent by the form. Theform_withhelper will automatically fill in theidpart of the path based on theMcQuestionobject passed as itsmodelargument.
Verify that the form is displaying correctly by running the app and opening the URL http://localhost:3000/mc_questions/1/edit in the browser. The form should be displayed, filled with the data for the first McQuestion record. You can test the form with other records by changing the 1 in the URL to, for example, 2 or 3. The form will not yet be capable of handling submissions. We will tackle that functionality in the next part.
2. Processing Form Data with the update Action
First, add to routes.rb the standard resource routes for the update action, inserting them after the edit route, like this:
patch 'mc_questions/:id', to: 'mc_questions#update' # update (as needed)
put 'mc_questions/:id', to: 'mc_questions#update' # update (full replacement)
Notice that instead of using a single POST request, like we did for the create action, we use two new HTTP request methods: PATCH and PUT. An edit form in Rails may use either of these two, so we list them both in the routes. The main difference between these two HTTP request methods is that PATCH is supposed to be used when only certain parts of a record are to be modified, whereas PUT is supposed to be used when the whole record is to be replaced.
As always, you must pay attention to the order of the routes. For example, the newly added PATCH/PUT routes with the URI pattern 'mc_questions/:id' must come after the new route ('mc_questions/new'); otherwise, requests that are meant to go to new will instead be routed to another (incorrect) action.
Now let’s fill in the logic to the update action. The action must first retrieve the object to be updated from the database, using the id in the request URL. Next, the action must attempt to update the object using the mc_question data the params hash. If saving the object is successful, the action will respond with an HTTP redirect to the index page. If saving the object is unsuccessful, the action will render the edit form again with a flash error message. Psuedocode for the logic would look like this:
def update
  # load existing object again from URL param
  # respond_to block
    # if question updates with permitted params
      # success message
      # redirect to index
    # else
      # error message
      # render edit
end
Perform the following steps to fill in the actual code.
Add code to retrieve the existing McQuestion object using find method and the id passed in via the params hash, like this:
# load existing object again from URL param
question = McQuestion.find(params[:id])
Add the respond_to block, like this:
# respond_to block
respond_to do |format|
  format.html do
    # if question updates with permitted params
      # success message
      # redirect to index
    # else
      # error message
      # render edit
  end
end
Add the if/else logic using the update method, like this:
# respond_to block
respond_to do |format|
  format.html do
    if question.update(params.require(:mc_question).permit(:question, :answer, :distractor_1, :distractor_2))
      # success message
      # redirect to index
    else
      # error message
      # render edit
    end
  end
end
Note that the form data is retrieved from the params hash in exactly the same way as it was in the create action.
For if part (where question.update is successful) add a success message to the flash hash and a redirect to the index page, like this:
# success message
flash[:success] = 'Question updated successfully'
# redirect to index
redirect_to mc_questions_url
For else part (where question.update fails) add an error message to the flash hash using flash.now, and re-render the edit page, like this:
# error message
flash.now[:error] = 'Error: Question could not be updated'
# render edit
render :edit, locals: { question: question }
Lastly, there is a CSS style issue that we must address. If a model attribute has an associated error (as per the model errors method), then the form_with helper will automatically wrap that attribute’s label in an HTML div element with the CSS class field_with_errors. The default style for this CSS class exhibits some strange line spacing, and as a consequence, doesn’t look very nice.
Fix this style issue by adding CSS code to app/assets/stylesheets/application.css, like this:
div.field_with_errors {
  color: red;
  display: inline;
}
Note that the color property in this CSS code sets the font color of the wrapped label text to red. The display property corrects the odd line spacing issue.
Verify that the form is works correctly by running the app and opening the URL http://localhost:3000/mc_questions/1/edit in the browser. The form should be displayed, filled with the data for the first McQuestion record. Submitting changes to the form fields should no update the record in the database. As before, you can test the form with other records by changing the 1 in the URL to, for example, 2 or 3.
3. Linking to the edit Form from the index and show Pages for McQuestion Records
For this last part, we will add hyperlinks to the other pages to make accessing the edit form more convenient for users.
Add to the index view a 🔎 link to the show page and a 🖋 link to the edit page for each question, like this:
<p>
  <%= question.question %>
  <%= link_to '🔎', mc_question_path(question) %>
  <%= link_to '🖋', edit_mc_question_path(question) %>
</p>
Add the edit-page link after the question text on the show page as well, like this:
<p>
  <%= question.question %>
  <%= link_to '🖋', edit_mc_question_path(question) %>
</p>
You should now be able to navigate to the edit page for any question by clicking the 🖋 link for that question on the index page or the show page.
The QuizMe app now has functionality for creating and updating multiple-choice questions. In the next demo, we will complete the app’s CRUD functionality by enabling users to delete records.